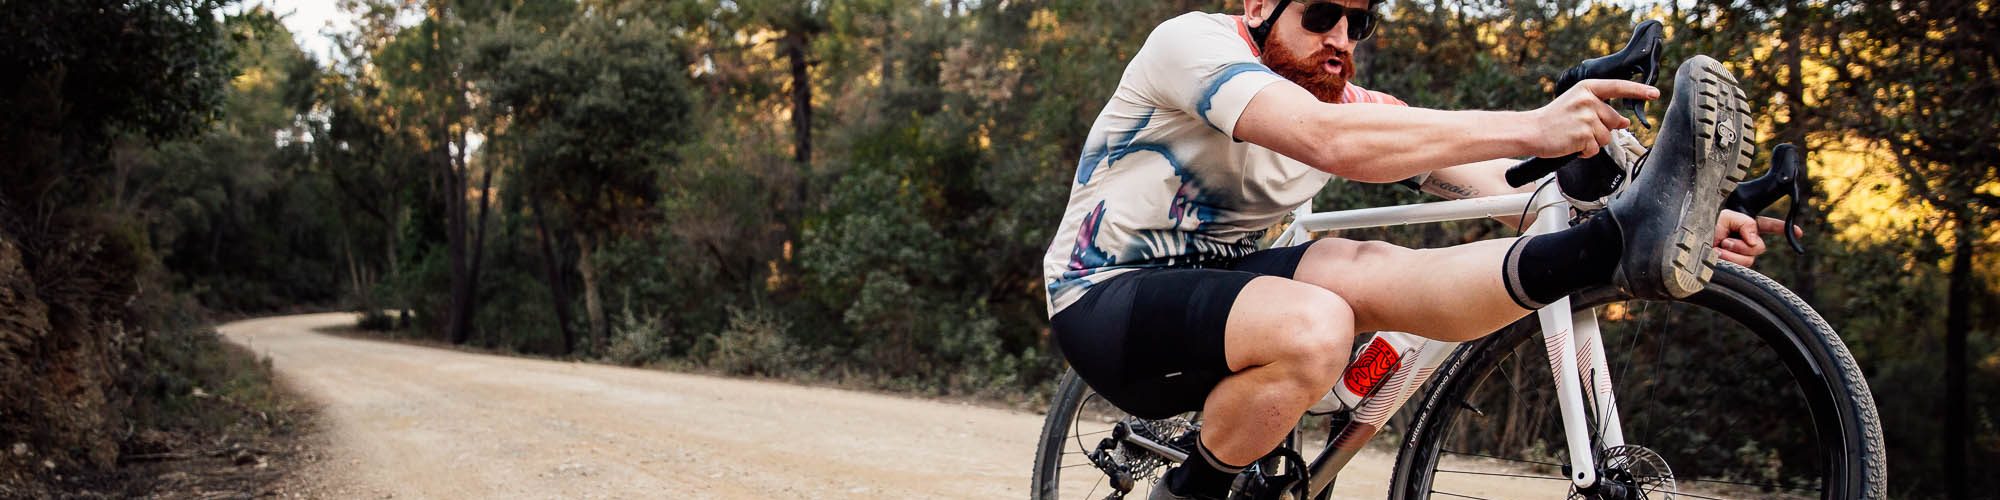
As one of just three points of contact with the bike, pedals are extremely important. Good pedals increase your wattage by improving power transfer, give you more control and, above all, grow your confidence. But how do they differ? And which is the best all-rounder? We tested 8 models to find out.
Pedals are the unsung heroes of cycling. They have a huge influence on the bike’s handling but usually receive little attention. There’s a large selection on the market with seemingly minor differences, but these differences can have a big impact on the bike’s handling. We’re here to help you with your purchase decision, giving you the necessary know-how along with concrete product recommendations for different use cases.
What should you look for in a gravel pedal?
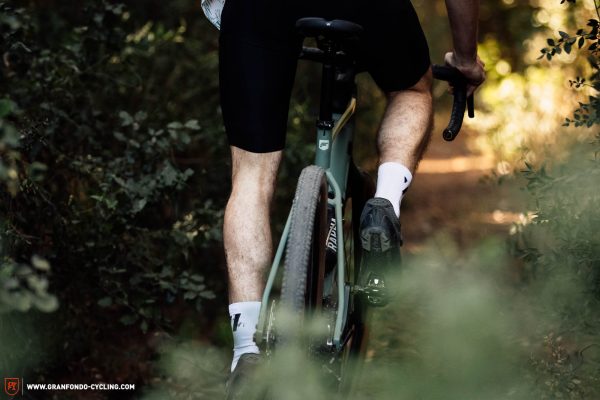
Let’s break it down by starting with the requirements of road bike pedals, which have a relatively simple task of delivering power. Or more precisely: maximum power transfer and minimum height to transfer power as effectively as possible. The requirements of gravel pedals, on the other hand, are much more complex since they must cover a much wider range of use cases. First of all, the cleats are recessed into the sole, instead of just being bolted on, to make walking more comfortable. In addition, they require a high degree of self-cleaning to function reliably in muddy conditions. Once you’re clicked in, the connection feels less firm, and you can still move your feet around to a certain extent.
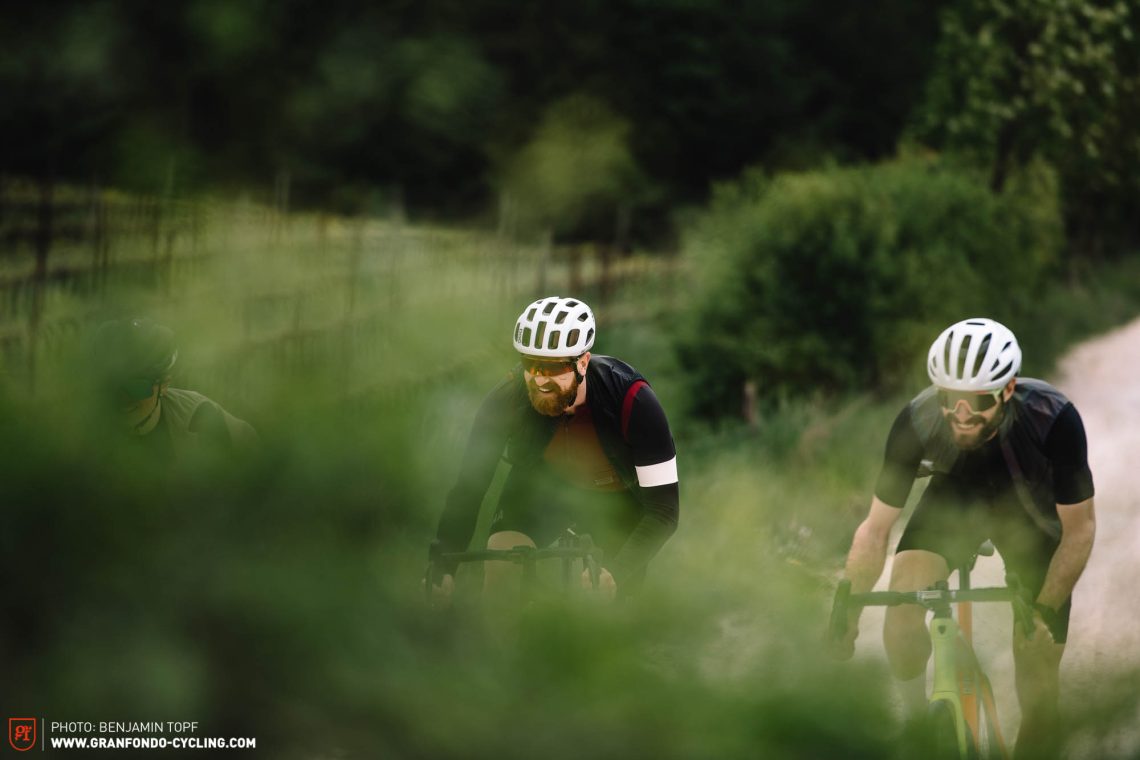
To find out which are the best all-round gravel pedals, our editorial team have gone on countless test rides with each pair of pedals. This included everything from quick post-work rides to extensive all-day tours, leisurely cruises and lactic acid battles. While doing so, we encountered a wide variety of weather and soil conditions. To perform in all these scenarios, the best pedals must be capable of a lot of things: they must provide a secure footing and a defined feeling clipless mechanism, though with enough float to let you move your feet and place them how you want. In addition, it’s important to be able to adjust the pedals to suit your preferences. Often, you can adjust the release angle and float by changing the cleats, while adjusting the spring tension determines how easily you can click in and out. Of course, you also want an efficient power transfer and, finally, they should be good at self-cleaning. As you can see, there are many demands – some of which are contradictory. Only the best pedals on test can fulfil all these requirements and provide a complete package.
Release angle, float, Q-factor
These three terms could also have come straight from a statistics manual. But, in fact, they’re values that offer a first glimpse as to how you can expect the pedals to interact with your shoes. The release angle indicates how far you must turn your feet to release the cleats. As such, it has only a slight influence on the pedals while you ride. However, it plays a significant role when you ride in the city and encounter a lot of traffic lights or have to put your foot down to keep your balance on the trail. It’s usually more pleasant to start with a smaller release angle, especially if you’re a beginner or you just don’t have a lot of experience with clipless pedals. But beware, your shoes are also more likely to come loose unintentionally as a result. This can happen due to the vigorous movement of feet during a sprint, for example. And coming unclipped during a full throttle effort is anything but pleasant.
The float describes how far you can turn your feet before you approach the release angle. It has a huge impact on the ride, as the float allows your legs to follow their natural movement. It allows you to adjust the angle of your feet on the pedals individually, which many sports physicians consider to be gentle on your joints. It can be a strange feeling to be able to move your feet even though you’re clicked in. Depending on the system, however, there are big differences in how this feels despite offering the same degrees of float.
The Q-factor indicates the distance from the outside of the cranks to the centre of the pedals and thus determines how far your feet are apart. With a small Q-factor, your feet are closer together and you can generally pedal a little more efficiently. A larger Q-factor, on the other hand, means that you have a wider stance, which gives you more confidence on trails, but it also means that you’re more likely to strike your pedals on the ground when cornering. However, like all things relating to ergonomics, it’s highly dependent on your personal preferences.
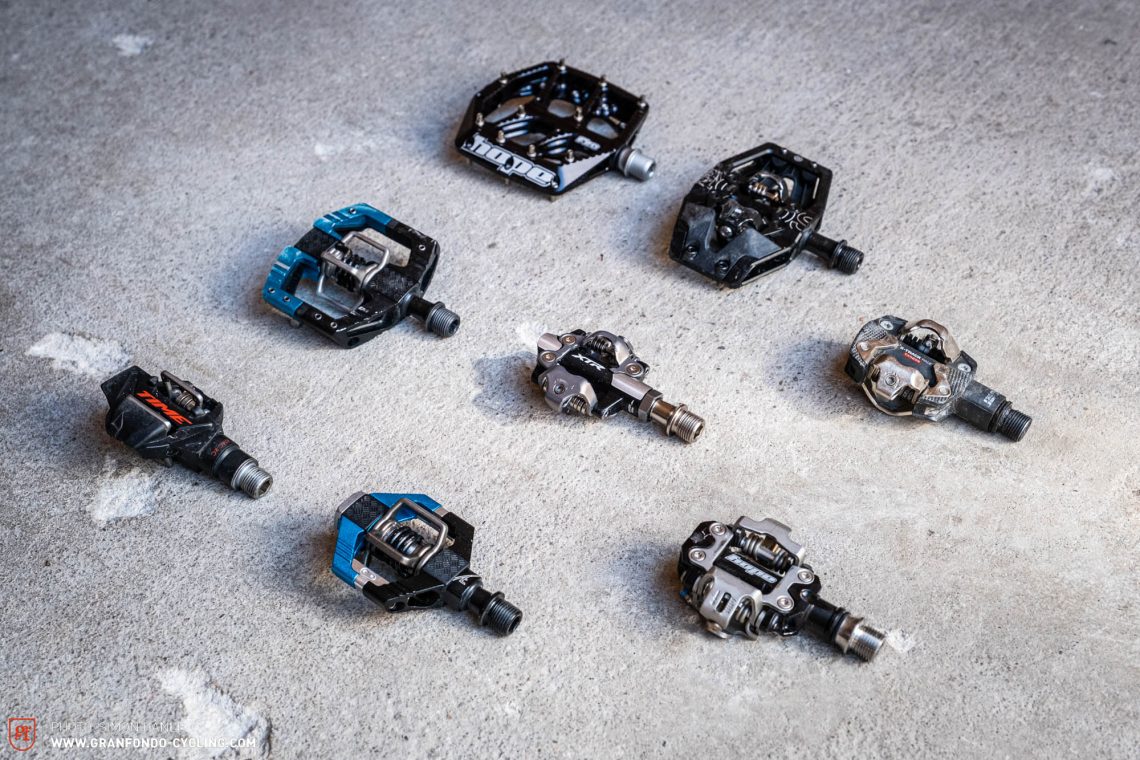
Which gravel pedals did we test? The test field
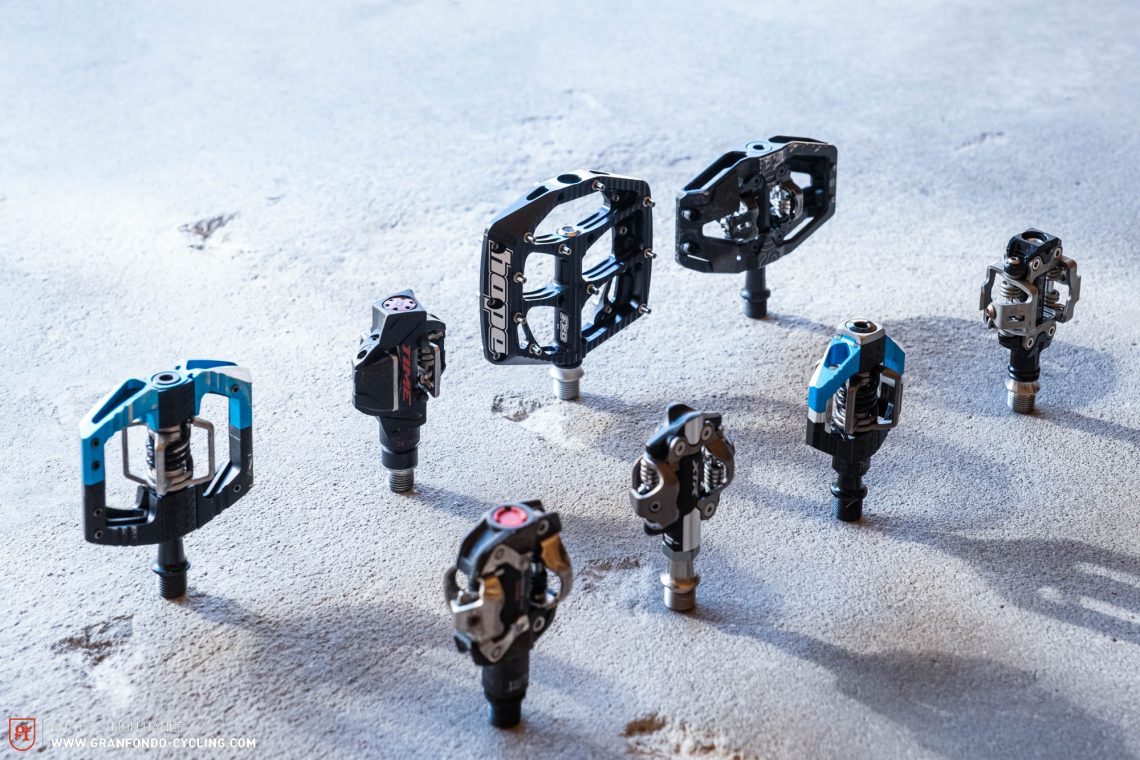
Gravel bike pedals are as diverse as gravel bikes themselves. From bikepacking to hike-a-bike adventures to all-road or gravel races, they must cover a huge range of applications. And so, we also have a wide range of different pedals in this test field, including small and light models like the Crankbrothers Candy 7, Hope Union RC, LOOK X-Track RACE CARBON, Shimano XTR or TIME ATAC XC 8, as well as big and heavy ones like the Crankbrothers Mallet E LS or the Acros Clipless Pedal, and even a pair of mountain bike flat pedals, the Hope F20. The 8 pedals on test cost between € 114 and € 195 and weigh between 291 g and 474 g (per pair, excluding cleats). You can find all the details about the pedals in the table below.
You can find all the details about the pedals in the table below.
| Brand | Model | Weight | Price | System | Float | Release angle | Q-factor | Stack height |
|---|---|---|---|---|---|---|---|---|
| Acros | Clipless Pedal | 474 g | € 119.95 | SPD | 4° | 13° | 52 mm/57 mm | 16.8 mm |
| Crankbrothers | Candy 7 | 321 g | € 179.99 | Crankbrothers | 0°/6° | 10°/15° | 52 mm | 15.5 mm |
| Crankbrothers | Mallet E LS | 428 g | € 179.99 | Crankbrothers | 0°/6° | 10°/15° | 57 mm | 15.5 mm |
| Hope | F20 | 408 g | € 175.00 | Flat pedal | – | – | – | 15.5 mm |
| Hope | Union RC | 318 g | € 195.00 | Hope | 4°/5° | 12°/13° | 55 mm | 15.5 mm |
| LOOK | X-Track RACE CARBON | 350 g | € 114.00 | SPD | 6° | 13° | 53 mm | 16.8 mm |
| Shimano | XTR PD-M9100 | 308 g | € 184.95 | SPD | 4° | 13° | 52 mm | 15.1 mm |
| TIME | ATAC XC 8 | 291 g | € 169.00 | TIME | 5° | 10°/13°/17° | 54 mm | 19 mm |
A or B – The two fundamentally different pedal systems
First of all, there is a fundamental question that doesn’t get asked all too often in the gravel scene, but it must be asked nevertheless: clipless or flat pedal? Due to the lack of a clipless mechanism, flat pedals can be used like any standard pedal you might find on an urban commuter. You don’t have to wear special shoes, which makes the pedals very suitable for more leisurely tours, as you don’t need a second pair of shoes to stroll through the city once you’ve parked your bike. In addition, it’s usually very gentle on your joints because you’re free to position your feet on the pedals in whatever way feels most natural and comfortable. Another advantage is that you can easily and quickly take your foot off the pedal if you’re riding on slippery terrain and get thrown off balance. However, if you slip off the pedal, the pins, which are actually there to prevent that from happening, are likely to gouge your shin. Since you can only transfer power to pedals during the downward stroke, most gravel riders prefer clipless versions.
As confusing as the name might be, clipless pedals are called clipless because they allow your feet to stay attached to the pedals without the so-called toe clips and straps that cyclists used when dinosaurs still roamed the earth. In this case, metal plates – cleats – get bolted to the soles of your shoes, which are held in place by spring-loaded mechanisms on the pedals. The cleats can be released by turning your feet or by applying a high force, as in the case of a crash. With your shoes and thus your feet firmly attached to the pedals, you’re able to apply force at every point of the cranks’ rotation, resulting in a more efficient power transfer. In reality, 360° pedalling is nothing but a myth. However, the classic falling over at the traffic light because you can’t get your feet out is a real phenomenon. As a small aside to all beginners: this has happened to every clipless pedal fan and is also likely to happen to you. Don’t worry, that’s just a part of it. In the long run, we still recommend switching over to clipless pedals, as this makes you feel much more at one with the bike.
Clipless gravel pedals and all their facets
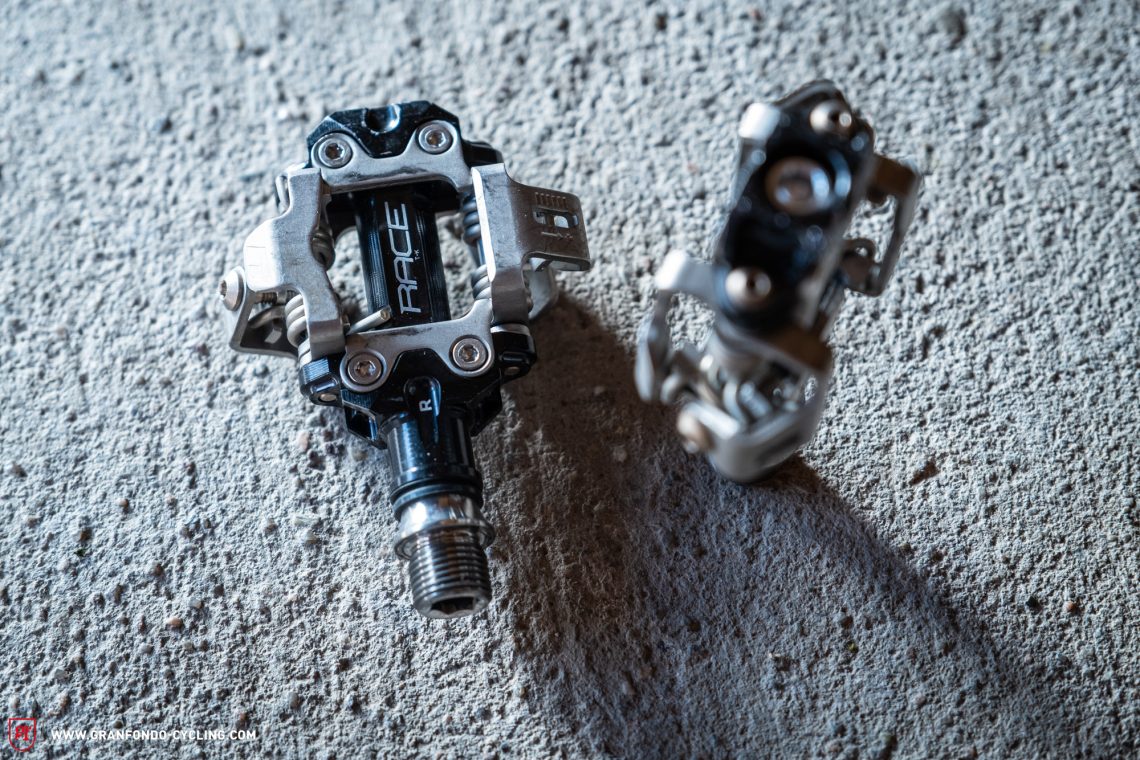
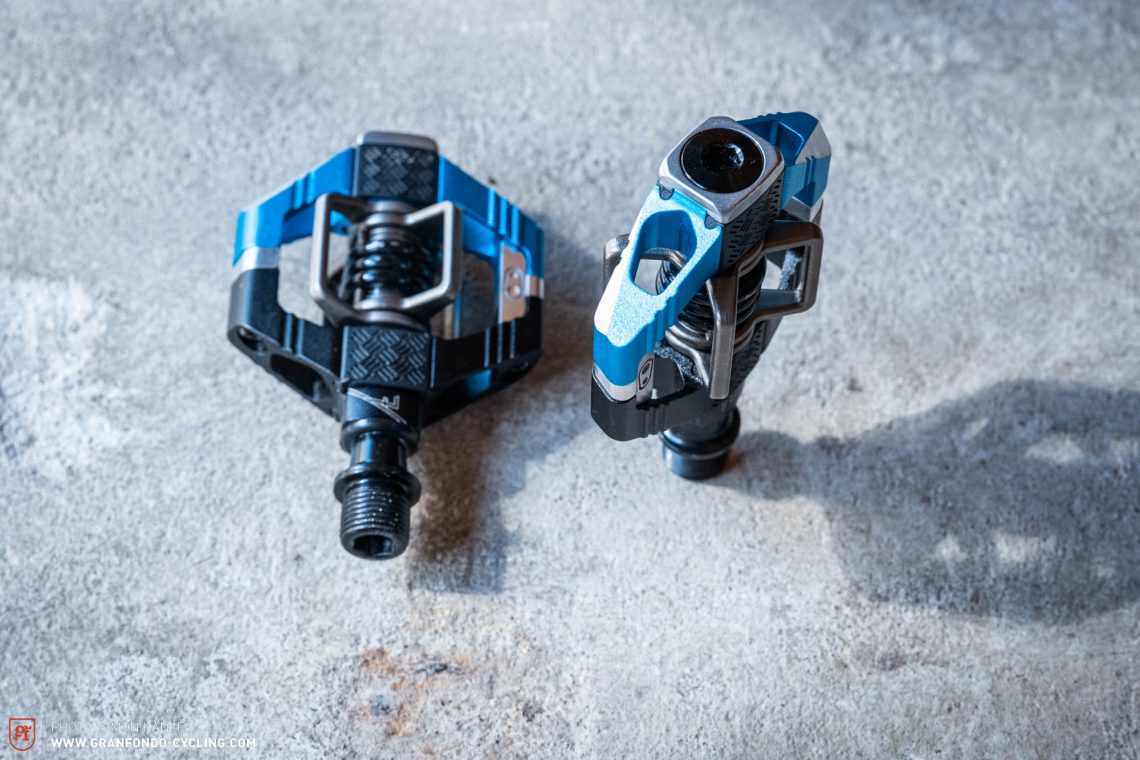
Not all clipless pedals are created equal. As you can see in the table, there are different systems, depending on the manufacturer. The most common is SPD (Shimano Pedalling Dynamics), which other manufacturers like Acros or LOOK also use for their pedals. This is characterised above all by its reliability and durability. Crankbrothers have their own system, which is especially popular with mountain bikers due to its free floating feeling. Hope and TIME are somewhat less common, providing a feeling that lies somewhere between Shimano and Crankbrothers. But why are we testing mountain bike pedals in a gravel pedal group test? Quite simply, there are many parallels between the two: the clipless mechanisms are the same and therefore they generally offer a similar feel. The difference is that the mountain bike pedals have a bigger cage around the mechanism, providing a more secure footing. This instils you with confidence on technical trails, though they also come with a significant weight penalty. However, our selection for this group test is anything but capricious. The Crankbrothers Mallet E LS and the Hope F20 are the respective winners of the clipless pedal group test and flat pedal group test conducted by our sister magazine ENDURO.
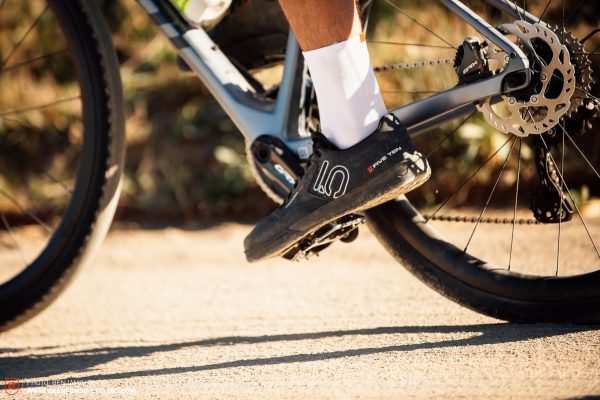
The pedals aren’t everything: the influence of the shoes
Ultimately, it’s not just the pedals you use but also the shoes you wear that play a major role. So, strictly speaking, we should always be talking about the shoe-pedal system. However, we want to spare you this tongue-breaker, keeping our gravel pedal group test simple and understandable. Moreover, shoes are subject to personal preferences – ergonomics are always subjective.
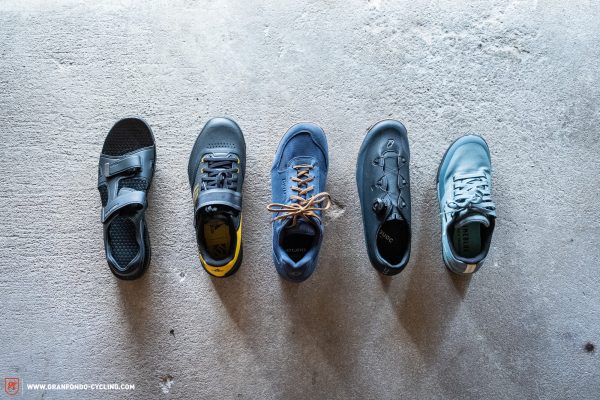
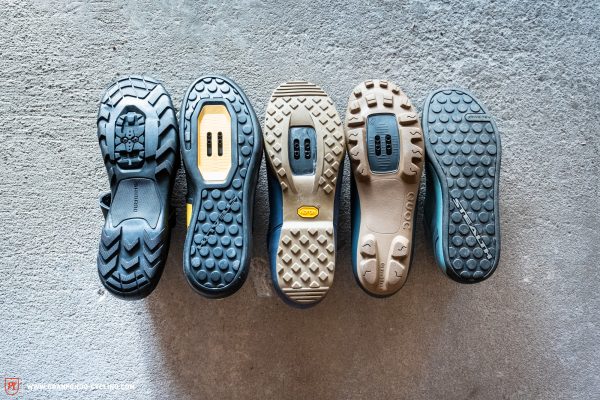
In general, though, you can divide suitable shoes according to their use case: do you just want to go on a short post-work jaunt, do an epic all-day tour or claim a new Strava KOM? For the latter, race shoes are probably the best choice. These are light and stiff, offering the optimal efficiency and power transfer, though they’re not comfortable to walk in. Trekking shoes are much more comfortable, but they’re somewhat softer and heavier, scoring lower in terms of efficiency and power transfer. Of course, you can also ride your gravel bike in shoes that are designed for mountain biking. They’re usually quite stiff, too, but also rather bulky and heavy. If you prefer riding with flat pedals but still want to have a secure footing, you can get MTB-specific flat pedal shoes. They’re stiff enough to ensure a good power transfer and have an extra soft, grippy sole that provides maximum grip on the pedals. However, there are shoes that combine the best of all these different options, the holy grail of gravel shoes, so to speak: sandals with cleat boxes. They can be used with all common clipless pedals, featuring the timeless style and excellent ventilation that only sandals can offer. Remember, always wear them with socks. 😉
Which are the best gravel pedals?
All the pedals on test offer a solid performance and fulfil their purpose. However, they differ significantly in the finer details. There are big differences in how they feel when clicking in, their self-cleaning properties and the adjustment options. We found the best all-rounders that can handle every situation, but we also have recommendations for more specific use cases, such as bikepacking or racing!
Best all-rounders: Hope Union RC
No other pedals on test are as well rounded as the Hope Union RC. Clicking in is easy yet it feels nicely defined, and they’re excellent at self-cleaning. With these all-round capabilities, they secure themselves the Best in Test victory! Hot on their heels are the proven Shimano XTR PD-M9100, which perform well in all situations. The more affordable XT option isn’t far behind these either, although they weigh a little more but cost significantly less.
Best bikepacking pedals: Crankbrothers Candy 7
Those who like to go on bikepacking adventures are well advised with the Crankbrothers Candy. Their float allows you to move your feet quite freely and they offer best self-cleaning characteristics on test. As such, you can stay comfortable on long rides, and you’ll be prepared for all conditions.
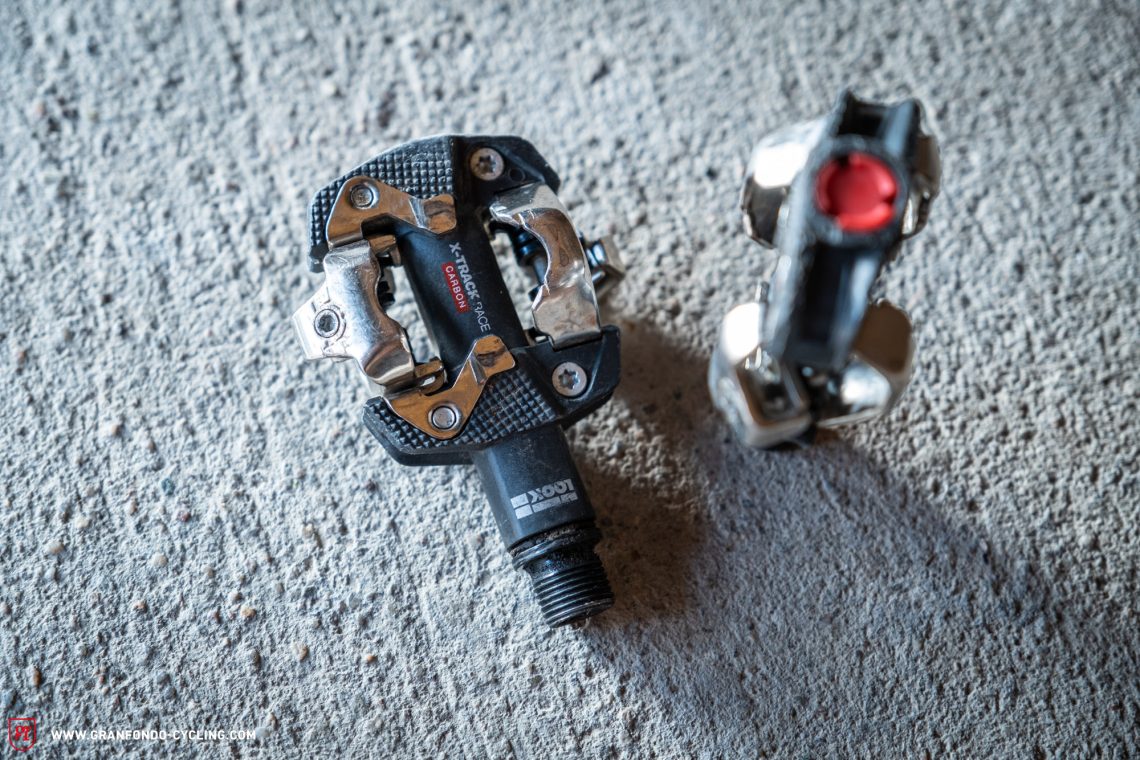
Best race performance: LOOK X-Track RACE CARBON
If you’re racing against the clock, we recommend the LOOK X-Track RACE CARBON. They might have a very specific use case, but they perform brilliantly in it. With the best power transfer of all pedals on test, they give you that road bike feeling, though they aren’t the best at self-cleaning and are therefore best reserved for dry conditions.
All pedals in test: Acros Clipless Pedals (Click for review) | Crankbrothers Candy 7 (Click for review) | Crankbrothers Mallet E LS (Click for review) | Hope F20 (Click for review) | Hope Union RC (Click for review) | LOOK X-Track RACE CARBON (Click for review) | Shimano XTR PD-M9100 (Click for review) | TIME ATAC XC 8 (Click for review)
Did you enjoy this article? If so, we would be stoked if you decide to support us with a monthly contribution. By becoming a supporter of GRAN FONDO, you will help secure a sustainable future for high-quality cycling journalism. Click here to learn more.
Words: Simon Kohler Photos: various