Bags and accessories for gravel bikes
Gravel bikes allow us to ride on pretty much all kinds of paths and surfaces. This makes them the perfect option for tours, travels and long adventure trips. Some bikes are even designed for this exact purpose. They represent the easiest and fastest way to ride long distances or multi-day tours on mixed terrain and to carry all of your luggage. While their origins lie in the sporty Randonneuring and Brevets from the olden days, “hiking by bike” is more popular today than it has ever been, and everyone is talking about “bike-packing”. Alongside fat- and mountain-bikes gravel bikes are becoming amongst the most popular choices for this purpose.
The basic concept, however, remains the same: packing the bare essentials without restricting the handling or limiting the possibilities of your bike. For this reason, we’ve seen a growing number of new products and solutions over recent years and new speciality-brands are springing up like mushrooms. Even bike manufacturers have started producing bags and accessories to go with their gravel bikes (e.g. Surly, Salsa, Specialized). A bike-packing setup usually consists of three items.
Saddlebag
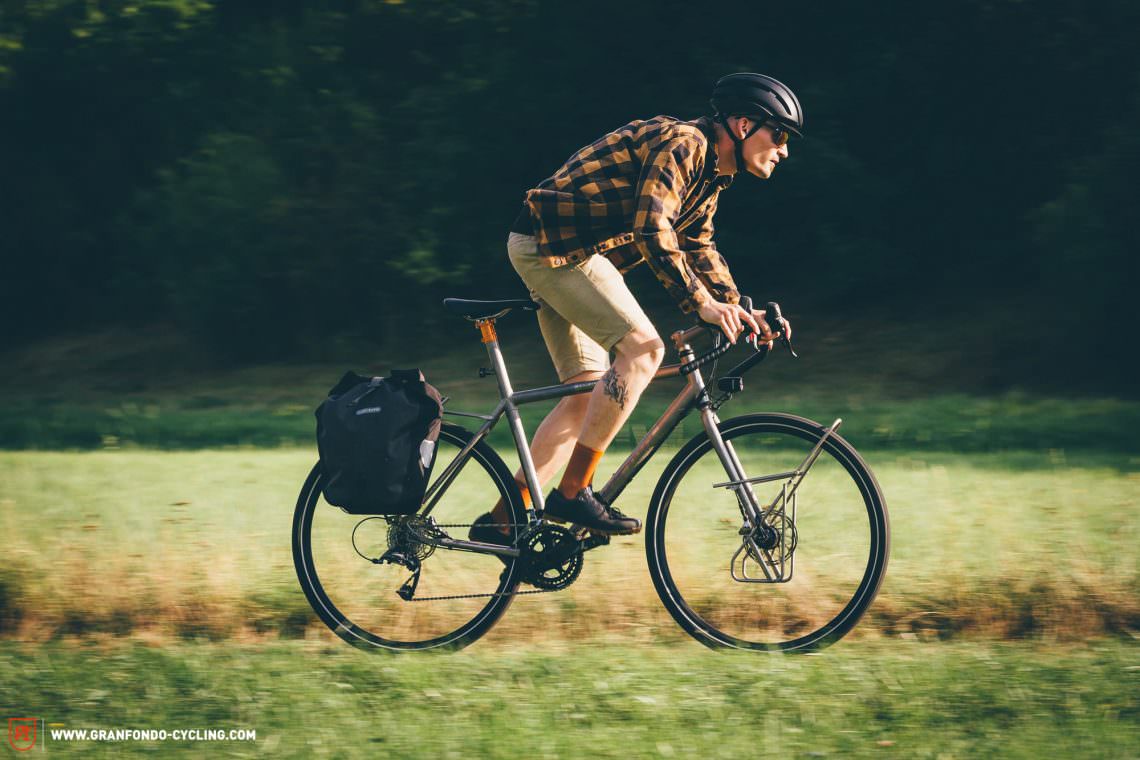
You’ll find them in all sort of sizes from basic essential-bags for your tools and inner-tubes to full-on 15 l packing monsters. A classic kit consists of a wedge-shaped pouch with a roll-up closing system that attaches to the seatpost and saddle rails. Saddlebags also function perfectly as mudguards – for your behind at least. Depending on their size and construction, saddlebags have a tendency to swing from side to side as you ride. To prevent lateral movement and improve packing efficiency some two-part systems rely on a reinforced holder which holds the packsack in place (e.g. Revelate Designs Terrapin System). For even more stability other systems use an additional metal strut on the bottom of the bag that clamps onto the seatpost (Porcelain Rocket Mr Fusion). You can also find saddlebags that are compatible with modern dropper posts (Bedrock Bags Black Dragon, Porcelain Rocket Albert, Revelate Designs Vole). The market currently offers a wide range of products varying in price and quality. Alongside the above-mentioned brands other manufacturers such as ORTLIEB, Apidura and Oveja Negra offer outstanding quality.
Frame bags
This is the heart of every touring and it’s available in two versions. One fills the frame triangle entirely the other one only takes up the upper part and leaves room for water bottles. The full-frame option allows for maximum payload but requires you to store the water bottles elsewhere (i.e. on the fork) and is more susceptible to side winds. Off the peg bags – both full or half models – are usually available in two or three sizes. If none of these options fits your frame, a custom bag is your only option. Custom bags are not much more expensive than off-the-shelf models but you might experience a long waiting list depending on the manufacturer’s popularity.
Handlebar-bags
Handlebar-bags: There are different options of handlebar-bags too. The cheapest one is a simple, ideally waterproof pack-sack (e.g. Sea to Summit eVent Compression Dry Sack). This attaches to the handlebars via simple straps or a bag with an integrated strap (e.g. North St. Pioneer 12 Pack + Handlebar Straps or Porcelain Rocket Horton). The second option is a pannier with integrated holders (e.g. Bedrock Vishnu or ORTLIEB Handlebar-Pack S). The third and most stable solution is a universal bag-attachment system (e.g. Revelate Harness). However, this is also your heaviest option. Many of these solutions are designed for mountain bike handlebars so make sure you double-check the width of the bag before buying one for your gravel bike – you don’t want to end up with a bag that is wider than your drops. Having said that many systems feature a roll top closure on each side of the bag which allows you to be quite flexible.
Forget the classic panniers. The new mantra is: light, compact and as handling-neutral as possible.
Alongside these three systems, there are also a number of smaller bags that attach to the top tube or to either side of the stem. Since most manufacturers offer a wide range of products with all sorts of unique shapes and options it’s worth looking through several brand portfolios. Some brands even offer custom bag-solutions. There are really no limitations to your imagination – except financial ones perhaps. And of course, you can try to be creative and come up with different home-made solutions or even sew your own bags.
We strongly recommend sticking some protective tape on your frame and handlebars to prevent the bags from damaging your bike. Because the combination of robust fabrics with movement and vibrations as well as dust and mud could quickly rub off the paint or worse.
If you prefer more classic Randonneur aesthetics and fastening methods you should take a closer look at brands like Carradice, Swift Industries or Gilles Berthoud.
Packing concepts
Payload and bag-layout requirements are a very subjective matter. With some experience however everyone will eventually understand what sort of bags they need and most importantly where and how they want to attach them to the bike. In this section, we will show you four methods to start with.
Minimal setup
For an extended day-ride or an overnighter in booked accommodation you won’t need to carry a lot: usually, an extra layer of windproof or waterproof clothing, a few tools, an inner tube, some water and a few snacks will do. Get yourself a small saddlebag and/or a handlebar bag that can be converted into a hip bag (e.g. North St. Pioneer 12 Pack) and you’ll be perfectly equipped. Just place your water bottles into the frame-holders and you’re good to go.
Light and fast
For a multi-day trip with booked accommodations it’s worth considering a partial frame bag (e.g. Revelate Tangle). This will only take half of your frame triangle and still allow for a normal bottle cage in the remaining space. Depending on size and manufacturer these bags will usually have a capacity of 2 to 6 l. If multiple bottles become an issue with this setup you can use special adapters like the Wolf Tooth B-RAD System. Combine this with a saddlebag, a handlebar bag without a pack-sack and a small bag on the top tube right behind the stem (e.g. PEdAL ED Node).
Long and far
But what if you’re travelling for several weeks or even months? A tent, a sleeping bag and a number of basic cooking utensils are indispensable and will take a considerable amount of space. In this case, you will need a full-sized frame bag. This will take all of your heavy, bulky stuff such as food, tent poles and tools, whilst keeping the bike’s centre of gravity low. Attach the bottle holders to the fork – one with integrated mounting points would come in handy. If your fork doesn’t have them you still have various options like the Anywhere from SKS or the BarYak Mule. A packsack on the handlebar will take care of your sleeping bag and spare clothing and another attached in front of it for all your accessories. A bag on the top tube and a snack-bag on both sides of the stem (e.g. Oveja Negra Chuckbucket) will hold an additional water bottle, all of your frequently used items and maybe some snacks. A change of clothes and bulky light stuff like your tent can go in a big saddlebag. This might sound like a lot of extra weight to carry around on a bike at first. But depending on the season and equipment you’re carrying, the total additional weight (without including water/food) shouldn’t exceed the 5-7 kg including the bags. That’s about the weight of a single regular pannier on a classic touring bike. Speaking of panniers: If you need even more space you don’t necessarily have to go for those 40-litre monsters. There are plenty of small, lightweight bags that are suitable for bikepacking – the Nano Panniers from Revelate, Bedrocks Hermosa UL Panniers or ORTLIEBs Gravel-Packs are only a few examples. However, the total weight will be still higher since this type of bag requires a rack.
Commuting
If you’re planning to ride your gravel bike on your daily commute you can use the same bag setups. For practical reasons however the pannier-rack version is likely to be the better option. In this case, we recommend smaller bags (e.g. ORTLIEB Gravel-Pack) on the front wheel or a Porteur-/Randonneur bag with decaleur in front of the handlebar. If you’re interested in this kind of system, brands such as Surly, Nitto, Carradice, Swift Industries or Gilles Berthoud are your best bet. Since the weather is always full of surprises and the lighting conditions might not always be ideal you want to consider some mudguards and a decent lighting system. Luckily many gravel bikes come with the relevant mounting points or even with fenders which are specifically designed for the bike. These will spare you the ugly retrofit plug-in solutions and allow you to opt for a more sophisticated and more robust solution. Honjo leads the way here. Before you buy anything, make sure that your tyres and your frame will fit your new mudguards. As far as lighting goes you can choose either battery powered models (e.g. Lupine, Lezyne, Exposure or Knog) or long-term, carefree dynamo versions. The first solution allows you to remove the light quickly whenever you need it. If you prefer the second option Schmidt/SON and Shutter Precision offer the best dynamos and for lights you should look at Schmidt/SON, Exposure as well as Supernova. The extra weight for such a system is approx. 400-500 g.
This article is from GRAN FONDO issue #010
GRAN FONDO Cycling Magazine is published in a digital app format in both English and German. Download the app for iOS or Android to read all articles on your tablet or smartphone. 100% free!

Did you enjoy this article? If so, we would be stoked if you decide to support us with a monthly contribution. By becoming a supporter of GRAN FONDO, you will help secure a sustainable future for high-quality cycling journalism. Click here to learn more.