CX101: BARRIERS – Six techniques to manage them

After seeking out the cornering advice of US National Cyclocross Champion Jeremy Powers, Rapha is now turning their attention to one of the sport’s defining features, barriers.
Seeing a group of accomplished riders glide over the barriers in a cyclocross race is not unlike watching a sleight of hand trick – in the blink of an eye a rider goes from being astride their bike and pedaling, to being beside it and running. But what appears to be one smooth, fluid motion is actually made up of simpler, discrete movements, which can only be linked together with practice and patience. With this in mind, here are six tips to help you master the art of clearing the barriers.
1. Know the enemy
The first cyclocross races were point-to-point affairs across fields, with fences, streams and hedgerows creating a natural set of obstacles and barriers along the route. As the sport moved towards using closed circuits, using man-made barriers became a way of forcing riders to dismount at key sections of the course.
The UCI mandates that course designers can only include man-made barriers that are a maximum of 40cm in height and spaced 4-6 m apart, a rule that is generally followed at amateur levels of cross, too. There’s also a limit of only six man-made obstacles per lap, so to increase the challenge expect to be routed over every tree root and natural barrier in the vicinity of the start line.
2. Line choice
Setting up for dismounting means, picking a line and speed that aren’t going to launch you into a meme-worthy flight path. A good line is one with plenty of traction, a clear approach and exit. As you prepare to dismount make sure you have enough space around you to avoid putting your feet through your competitors’ spokes.

3. Three points of contact
Keeping at least three points of contact on your bike is one of the few golden rules of cyclocross – try to approach an obstacle with less than these three and you will find yourself sideways in an instant. As showcased in the photo above, a non-driveside dismount should be approached with the left hand on the shifter, right hand on the top tube and your left foot on the pedal.

4. The run
The moment his feet touch the ground, Powers hoists his bike high and to the right, giving as much space between his body and the bike as possible. Keen observers will notice that Powers is not a devotee of the New England step-through – a technique that resembles a confusion of limbs, and that’s responsible for half of all collisions at the barriers.

5. Back down to earth
According to Powers, there are two types of riders in this world: those who carelessly drop their bike to the ground, causing it to skip and bobble and those who place their bikes firmly on the ground, giving them a solid base from which to remount their bike.

6. Clearance
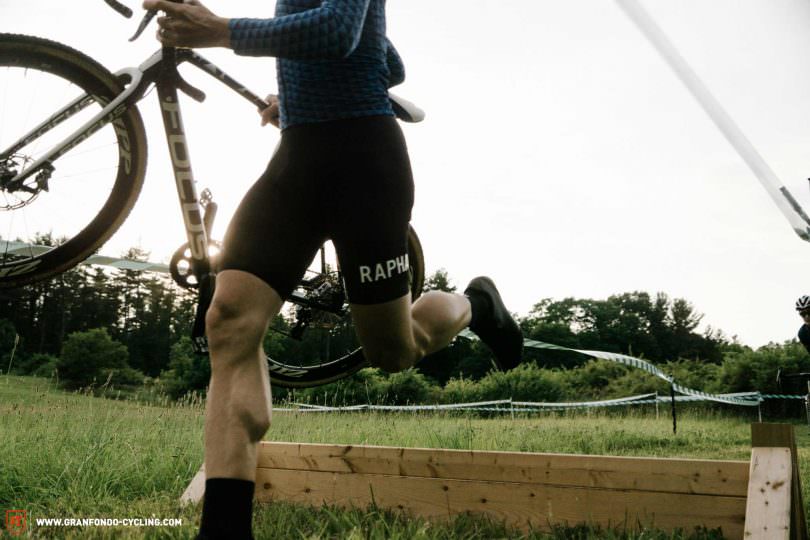
Remounting your bike should not be a case of launching yourself into the saddle with great force. As pictured above, there shouldn’t be much in the way of daylight between the leading leg and the saddle – as soon as you recognise any kind of ‘impact’ between your body and the saddle, you are doing something wrong. Think of a hurdling motion, not that of a long jumping.
As always, we recommend watching Jeremy Powers Cross Camp DVD for improving form and technique, a copy of which is permanently floating around Rapha HQ.
Don’t miss the previous cornering guide!
Did you enjoy this article? If so, we would be stoked if you decide to support us with a monthly contribution. By becoming a supporter of GRAN FONDO, you will help secure a sustainable future for high-quality cycling journalism. Click here to learn more.
Words: Rapha Photos: Andy Bokanev