You’re interested in bikepacking but you’ve got no idea where to put all of your luggage? Or you’re looking for a light, slimmed down method of carrying your things on your commute? We’ve compiled an overview of everything you need to know on the topic of bikepacking bags and explain which models work best for whom.
Table of Contents
- What kind of bikepacking bags do you get?
- Affordable alternatives
- Water resistance, lightweight construction, durability – a brief lesson in the science of materials
- Which bags do I need?
- The best complete set
- Packing tips – What goes where?

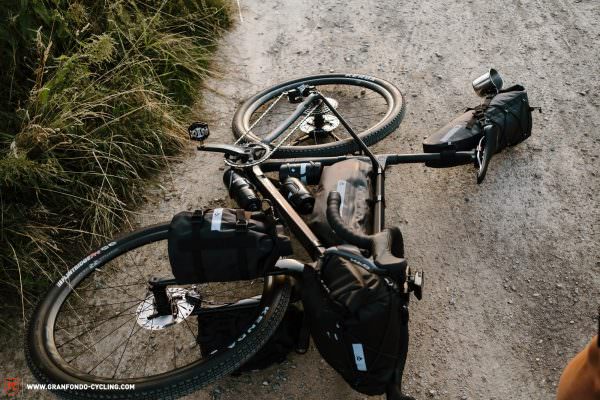
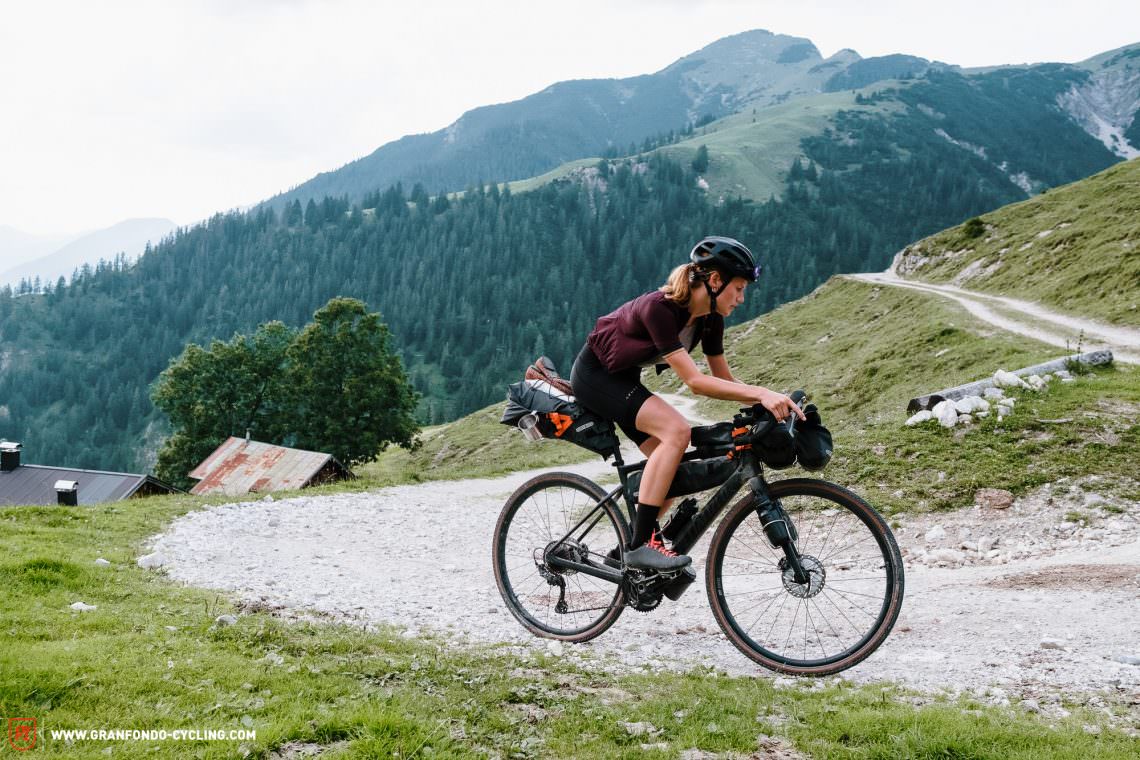
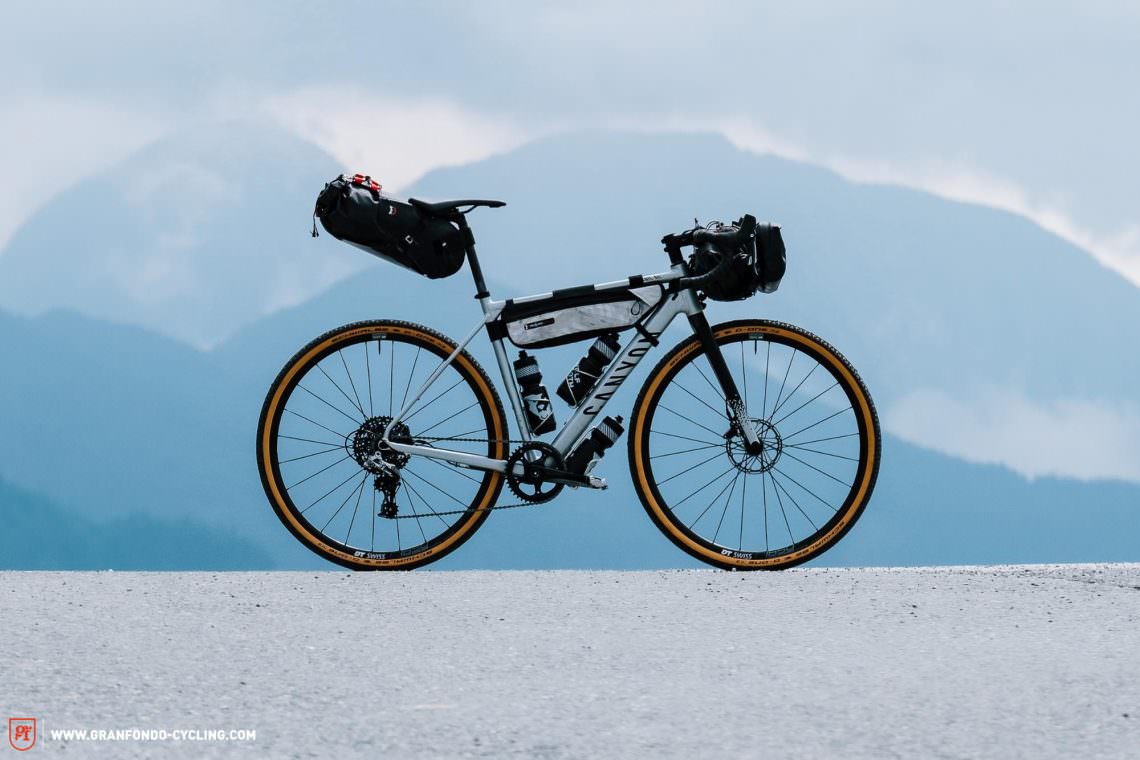
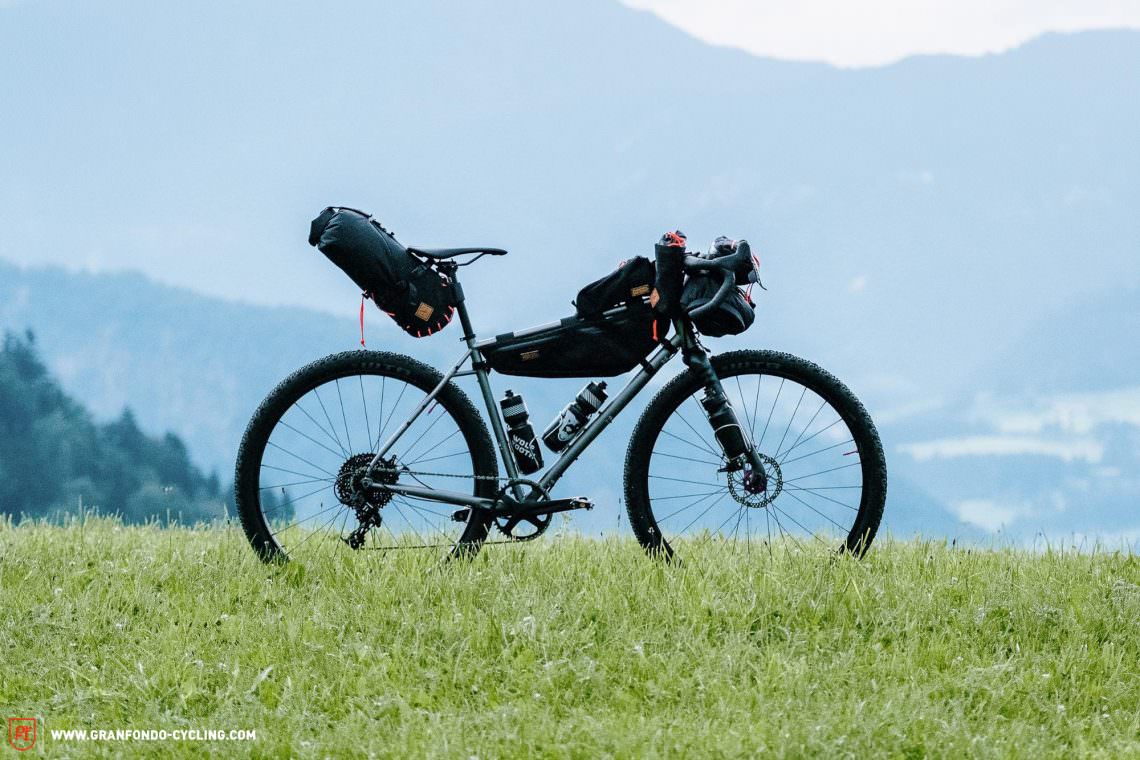
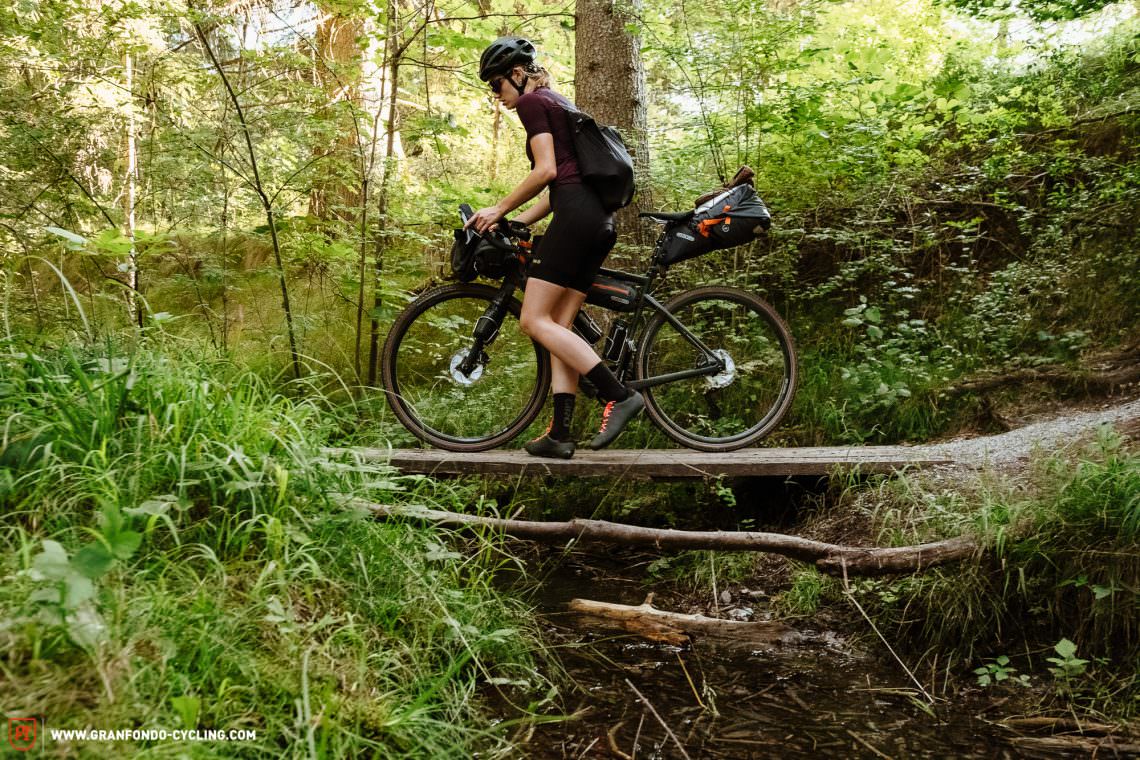
Regardless of the bike, the concept remains the same: less weight + improved weight distribution = more fun handling.
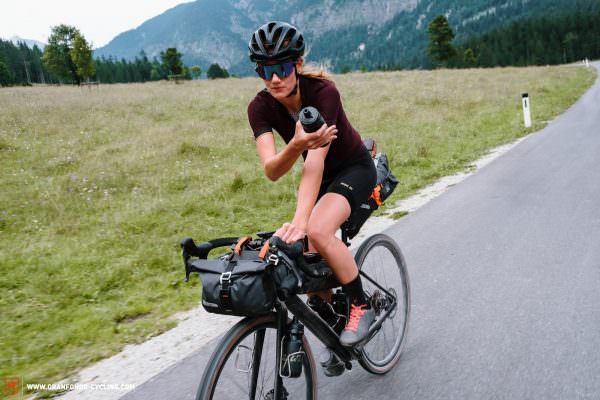
Gone are the times when carrying luggage on your bike meant having to weigh it down with heavy racks and huge panniers. While they still have their place in the market, traditional panniers are just too big and heavy for the needs of most riders. As bikepacking continues to grow in popularity, the range of alternative methods of carrying luggage on your bike has skyrocketed in recent times. Even if you’re not interested in bikepacking as such, you’ll still find a lot of exciting alternatives to hauling a heavy backpack around on your daily commute.
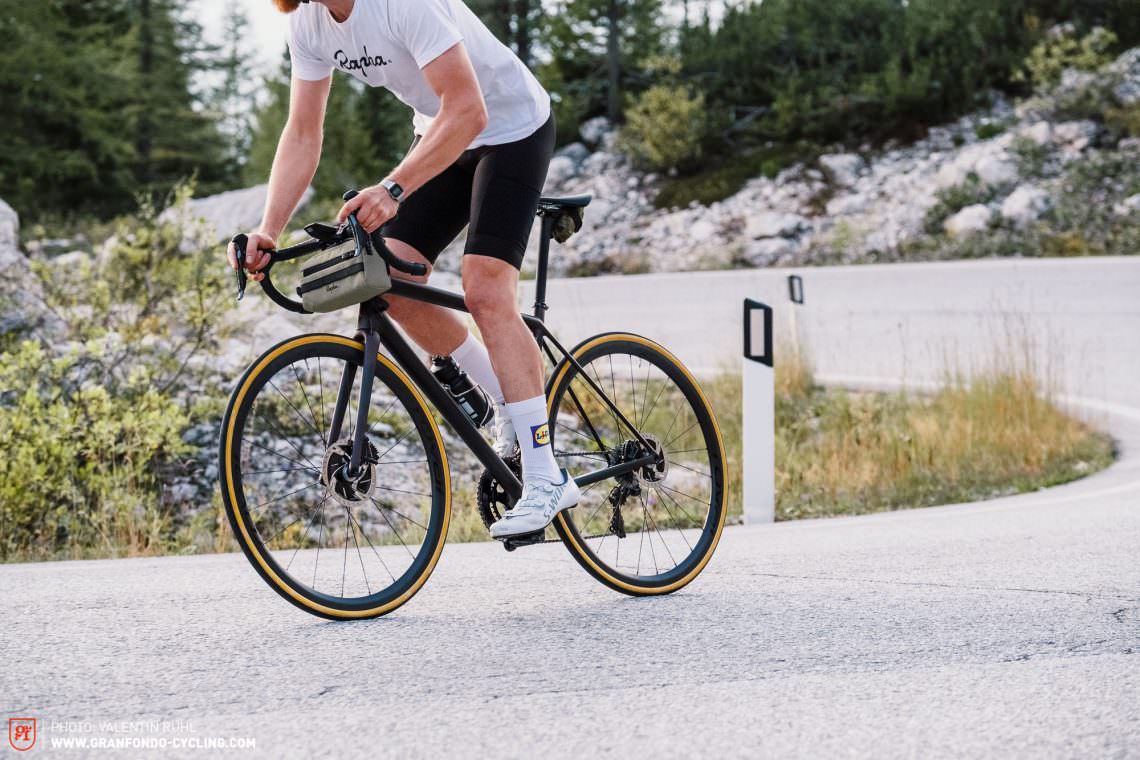
You don’t have to be planning a circumnavigation of the earth – bikepacking bags can also be an excellent solution for your daily commute.
A lot of our finding about bikepacking bags are coming from our huge group test on the best gravel bike for bikepacking. You should not miss this one! You want to know everything about bikepacking and bikes, gear, route planning and accommodation? Click here for our detailed Bikepacking 101.
1. What kind of bikepacking bags do you get?
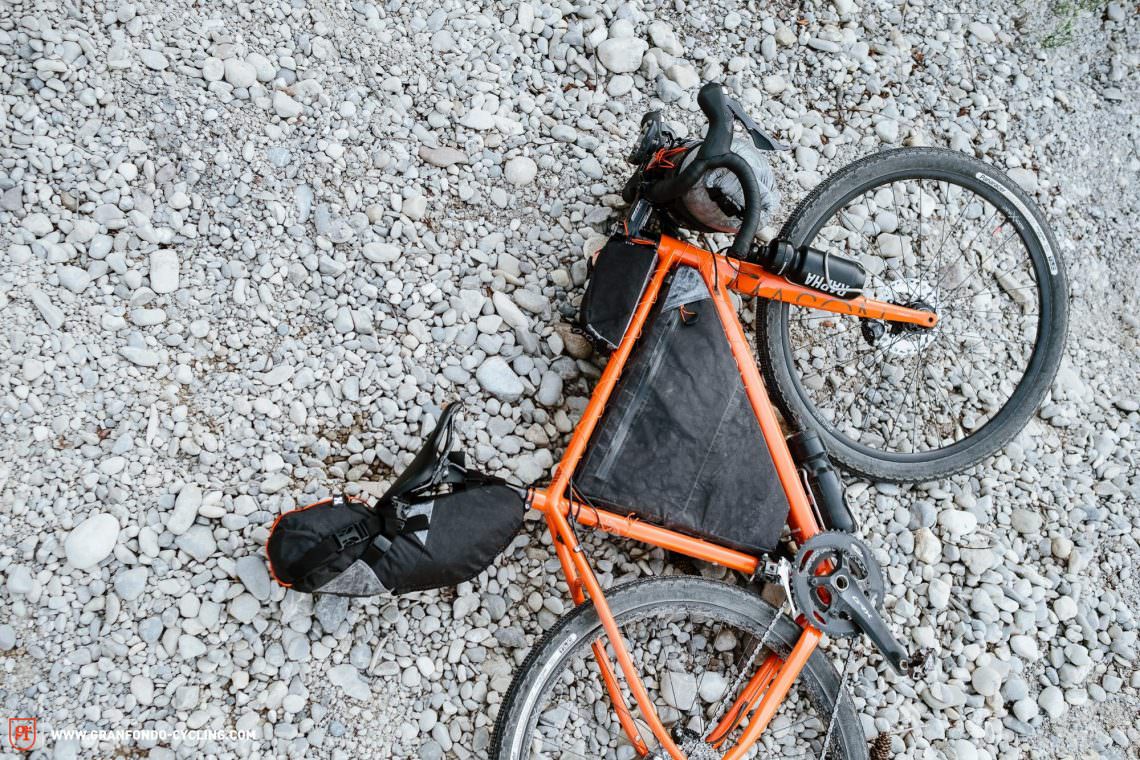
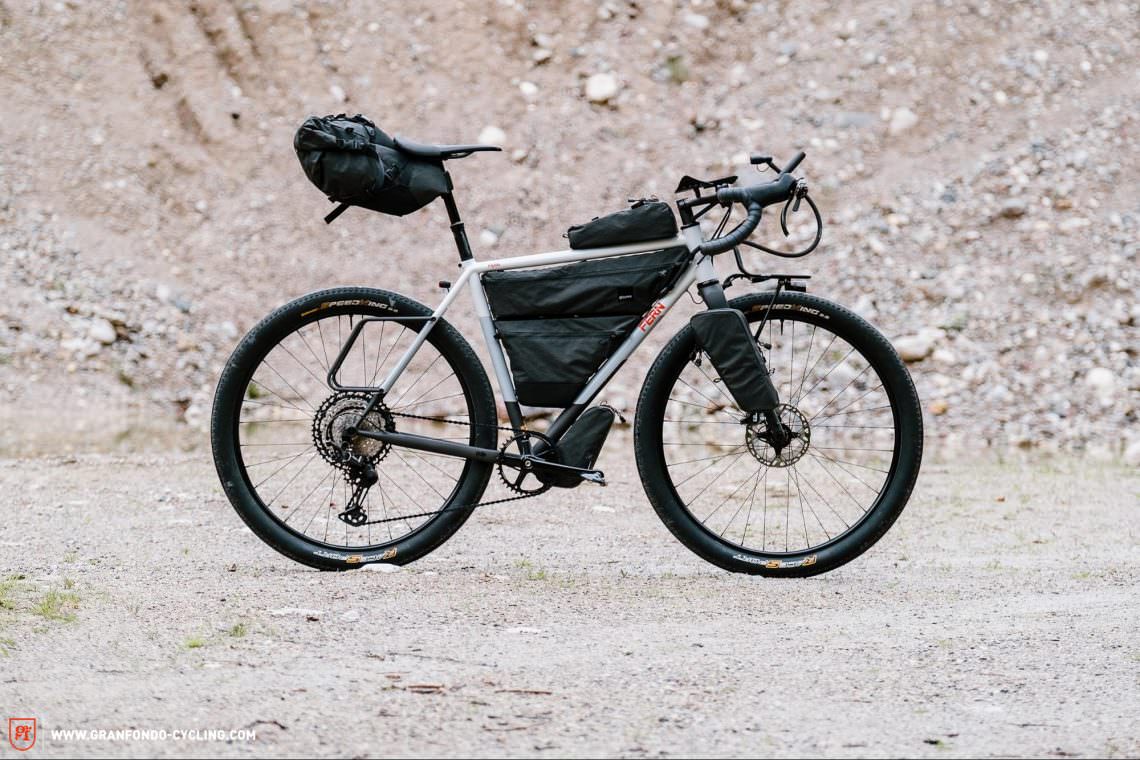
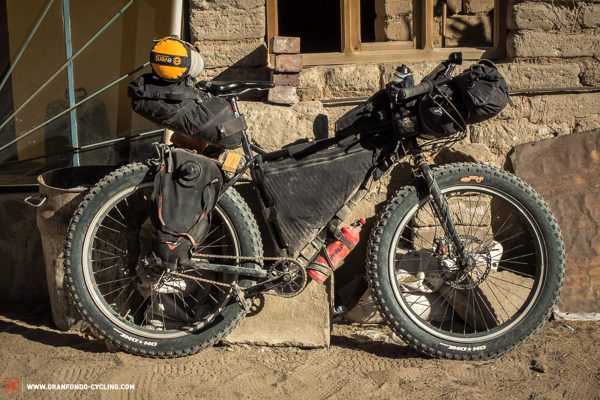
The basic principle of bikepacking bags is simple: carrying only the essentials and attaching them to the bike in such a way that they don’t hinder the bike’s performance and handling while using the available space as effectively as possible – regardless of whether its a road or a mountain bike. What this means in practice is that you want to avoid traditional bags that put all the weight on the back and stick out far to the side. Instead, your luggage usually gets split up between at least three separate, smaller bags on the bike. By doing so, your luggage doesn’t have too much of an effect on the bike’s centre of gravity and thus the handling, and you’ve got nothing sticking off the side of the bike.

The principle of the three main bags is always roughly the same, though the details will vary from one manufacturer to the next. Besides these main bags, you’ll find a huge variety of smaller bags for other areas on your bike like the handlebar or top tube. Following, we’ll go into more detail about the different models available on the market, what to look for when you buy and what to consider before putting them to use.
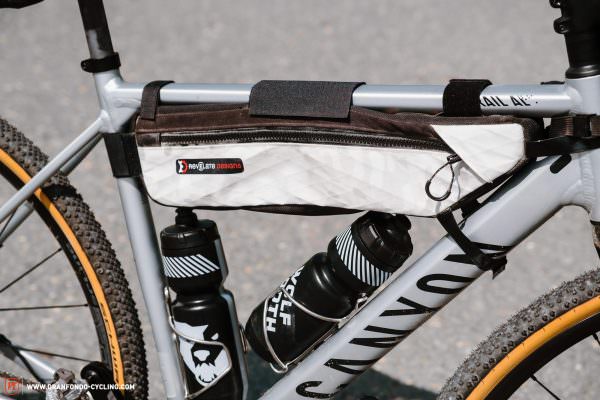
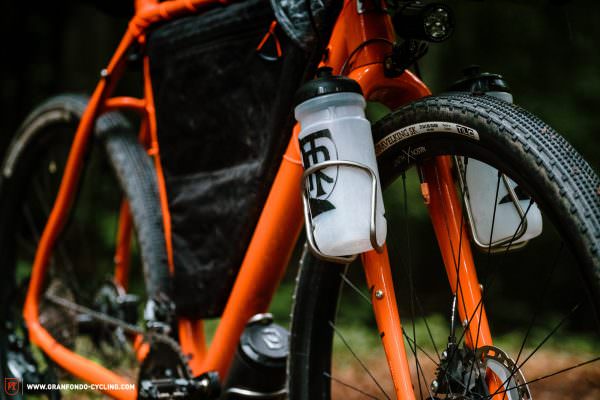
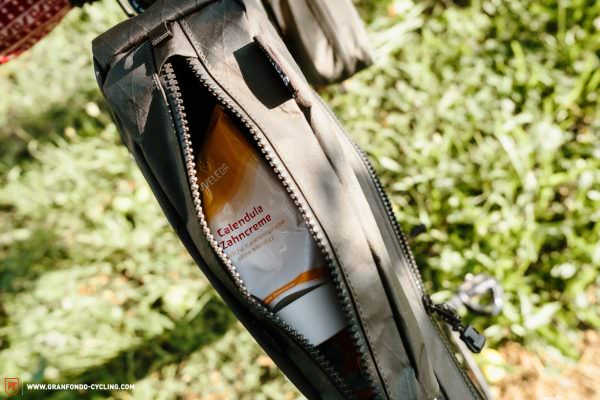
1.1 Frame bag
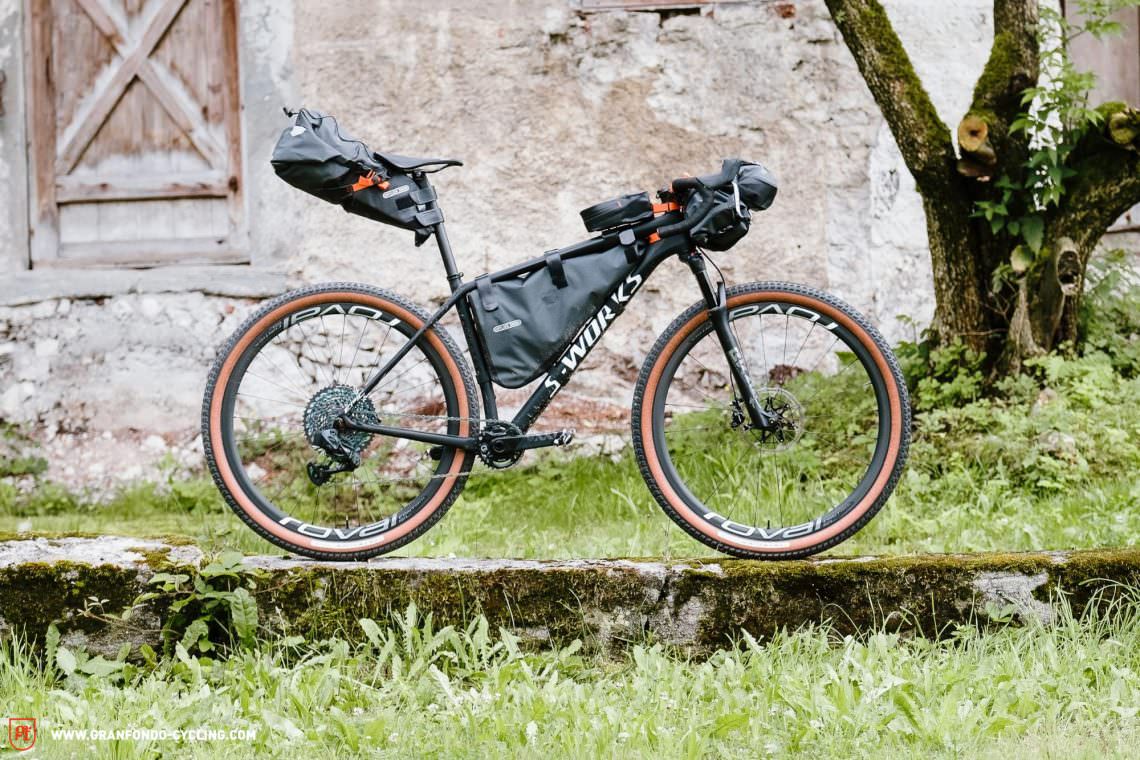
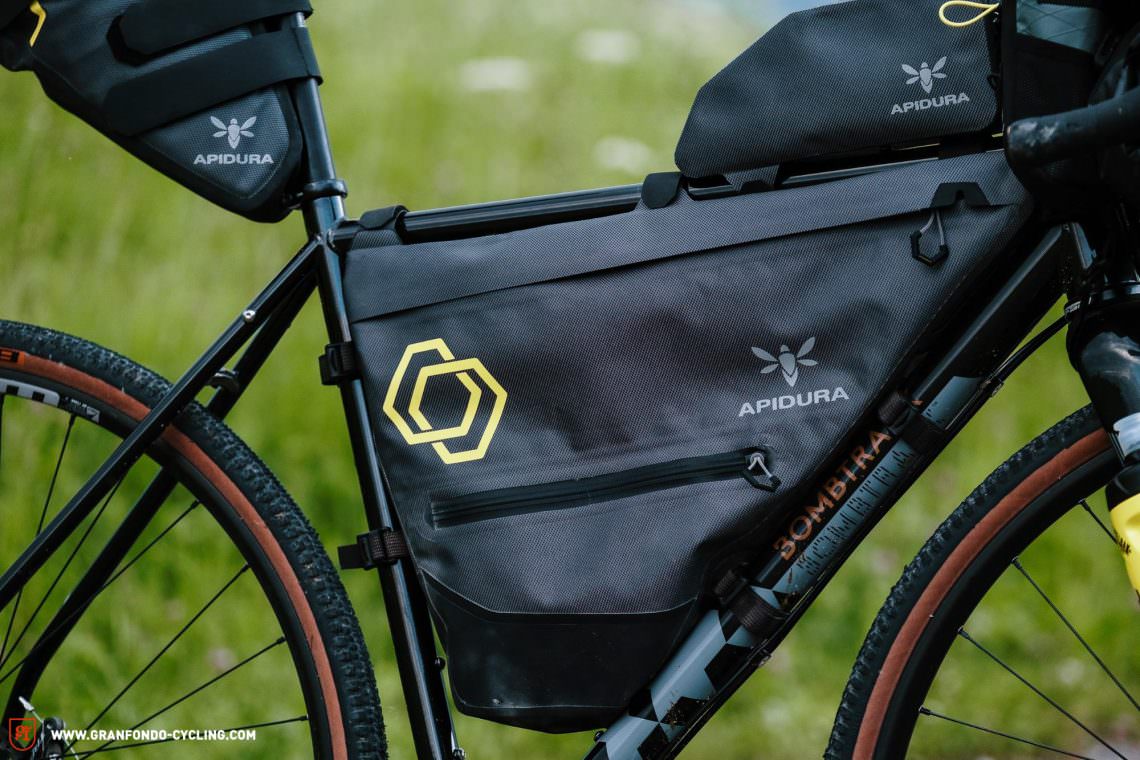
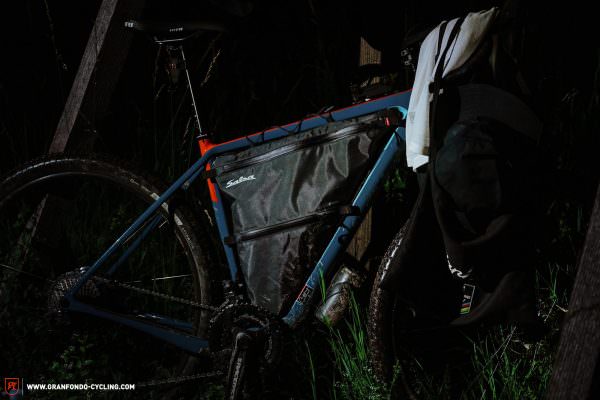
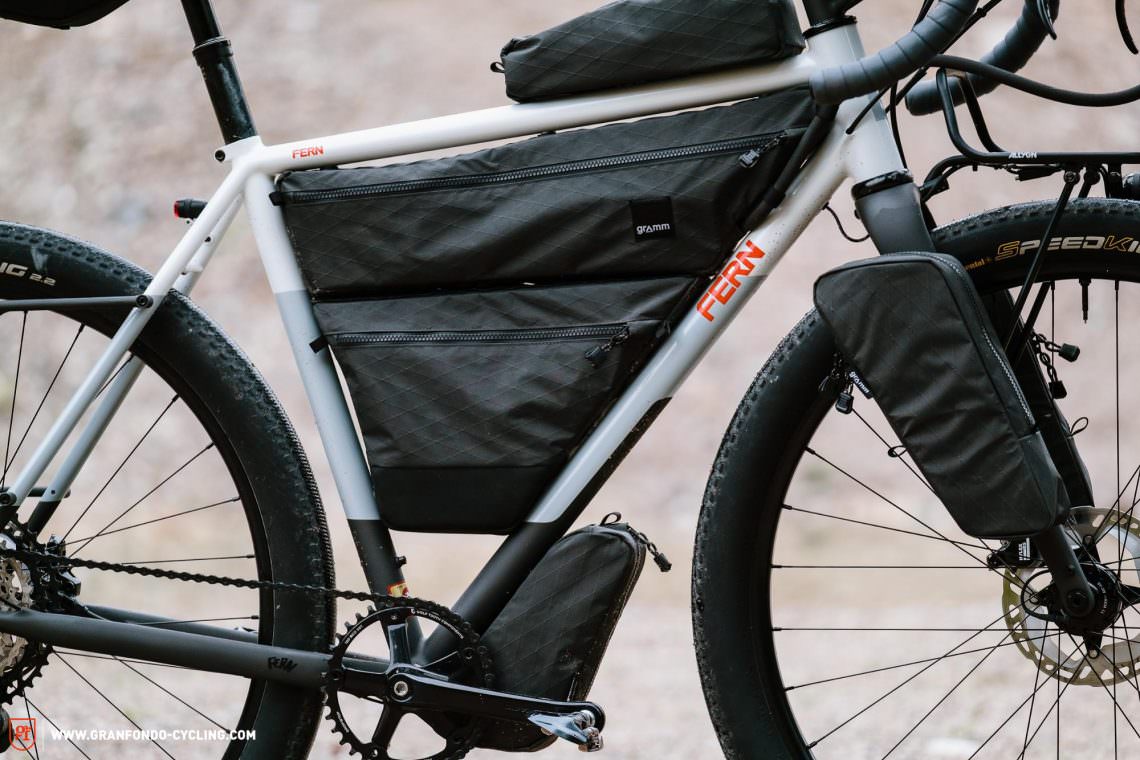
At the core of every bikepacking setup is the frame bag. It gets strapped inside the front triangle, either filling the complete space or only occupying the top or front half, leaving space for the bottle cage. The full frame bag gives you the most capacity, but it makes the bike more susceptible to cross winds and you’ll have to find another place to stow your water bottles (on the fork, for example). Depending on the size of the front triangle and the width of the bag, you’ll be surprised how much storage capacity a frame bag has. Big brands like Revelate Designs, Apidura or ORTLIEB all offer frame bags in at least two sizes, covering a wide range of frame shapes and sizes. With some bikes, including models from Salsa and Surly, you’ll be able to get bags purpose made to fit the respective frame. On average, the prices for good-quality off-the-shelf frame bags range from about € 100 for half and € 150 for full frame bags.
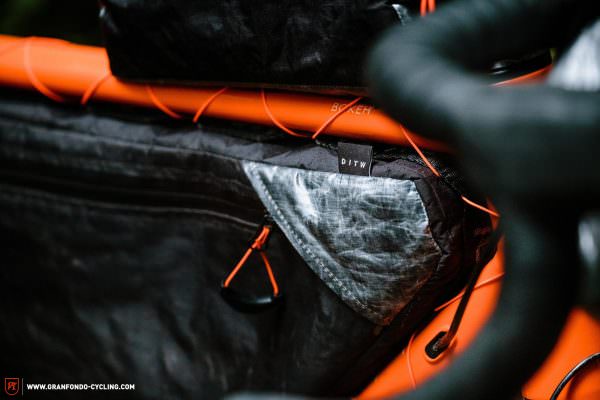
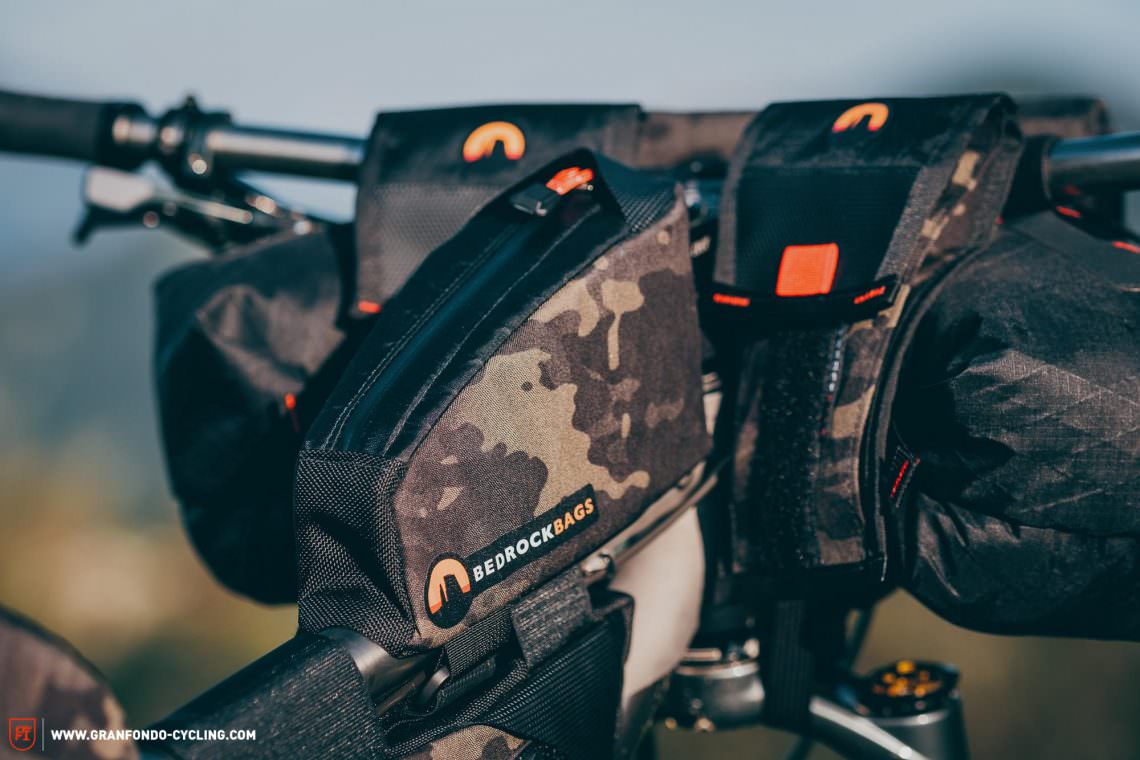
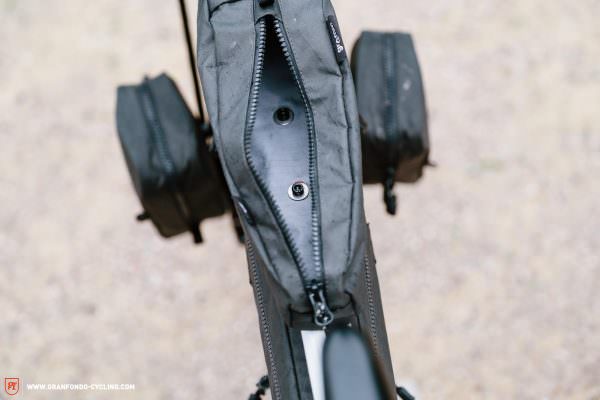
In case none of the standard bags available fit your frame – which is often the case with full-suspension bikes –, the only other option you’ve got left is to have the frame bag made to measure. However, this will cost about twice as much as a stock model and depending on where you’re ordering from and how popular the brand is, it might include long lead times and additional customs charges. What you get in return is not just a perfectly fitting frame bag, but also a lot of custom options to tailor it to your needs and preferences. For example, you can decide how many compartments you want, the colours and sometimes even the material used. You can also add special features such as using the bottle cage bosses to bolt the bag to the frame. For high-quality made-to-measure bags, we recommend checking out Rockgeist, Bedrock Bags, Rogue Panda, DITW or Gramm Tourpacking. Budget with around € 250–300 for a custom made bag of this kind. If you happen to have access to a somewhat robust sewing machine and you’ve got the skills to use it, you could also make a bag yourself. You’ll find all the material you need online at stores such as Extremtextil.
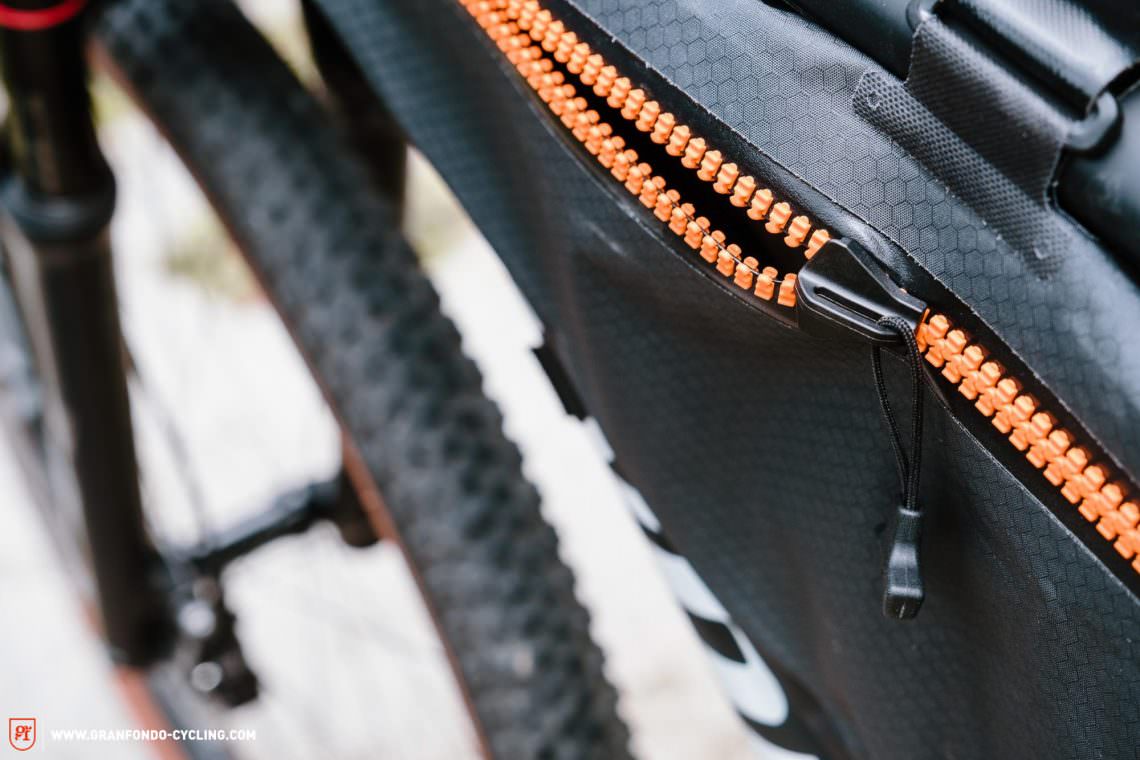
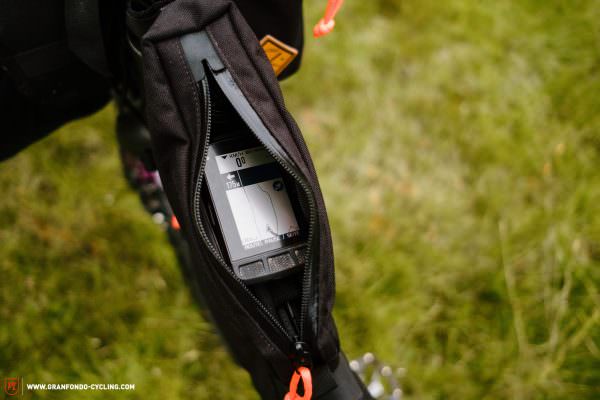
Most frame bags have one or more zippers. You’ll want these to be high-quality. Especially with the main compartment, since you’re likely to open and close this repeatedly throughout a ride. The bag will usually be hopelessly overfilled and when you go on a multi-day adventure, the zipper will also have to contend with dust, dirt and mud, which is why it’s usually the first part to fail. If you’re planning to go off-road on your adventures, it might be worthwhile to look for a bag with a roll-top closure such as the Porcelain Rocket 52Hz, or having a similar bag made. An alternative to this is stretch material around the zippers as you’ll find on most Revelate Designs frame bags which puts less strain on the zipper and allows it to last longer.
1.2 Saddle bag
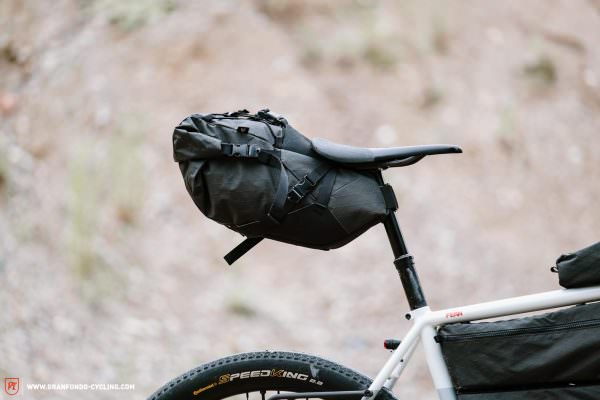
In the market for saddle bags, there are two variants in particular that have established themselves: light and compact models that are narrow but long and models that are wide/boxy with a flap for easy access.
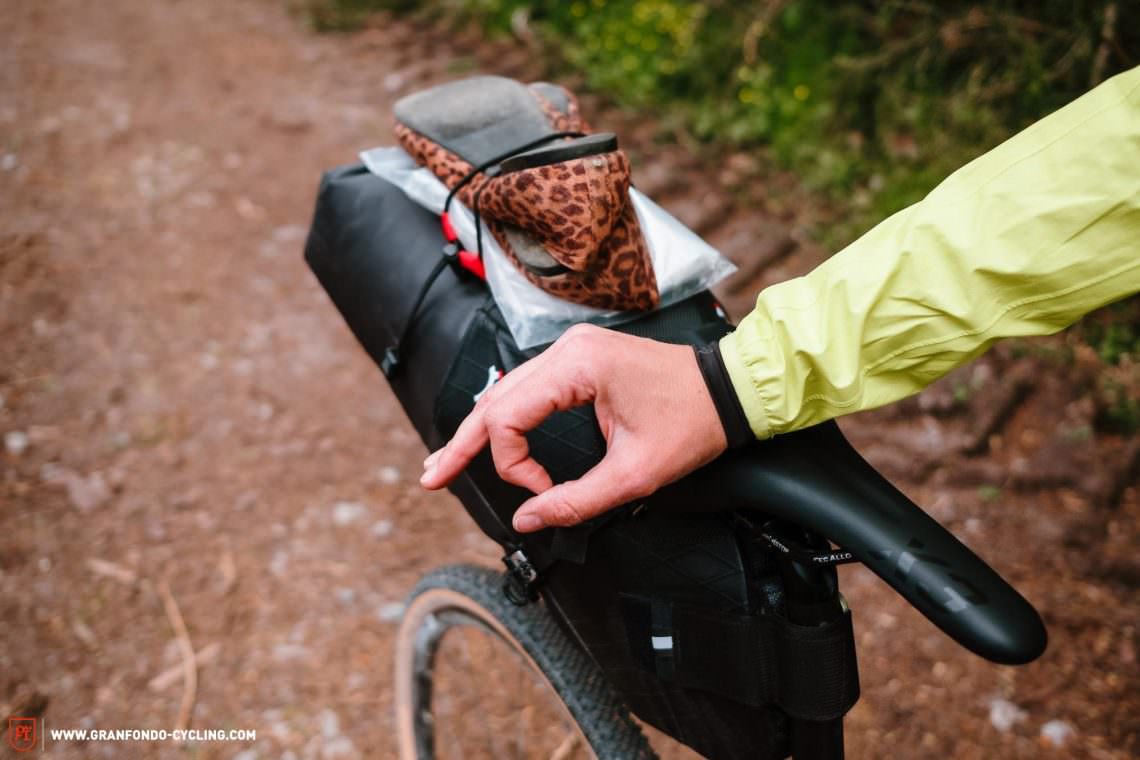
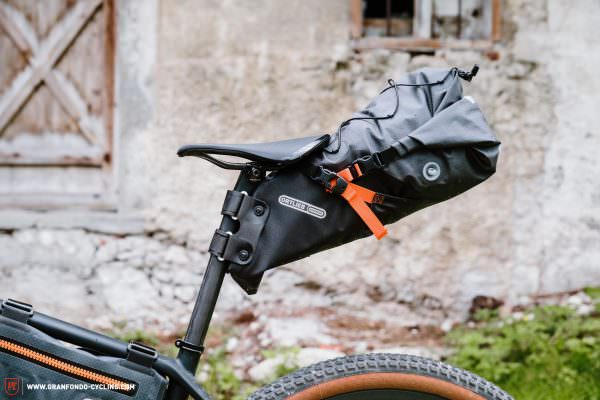
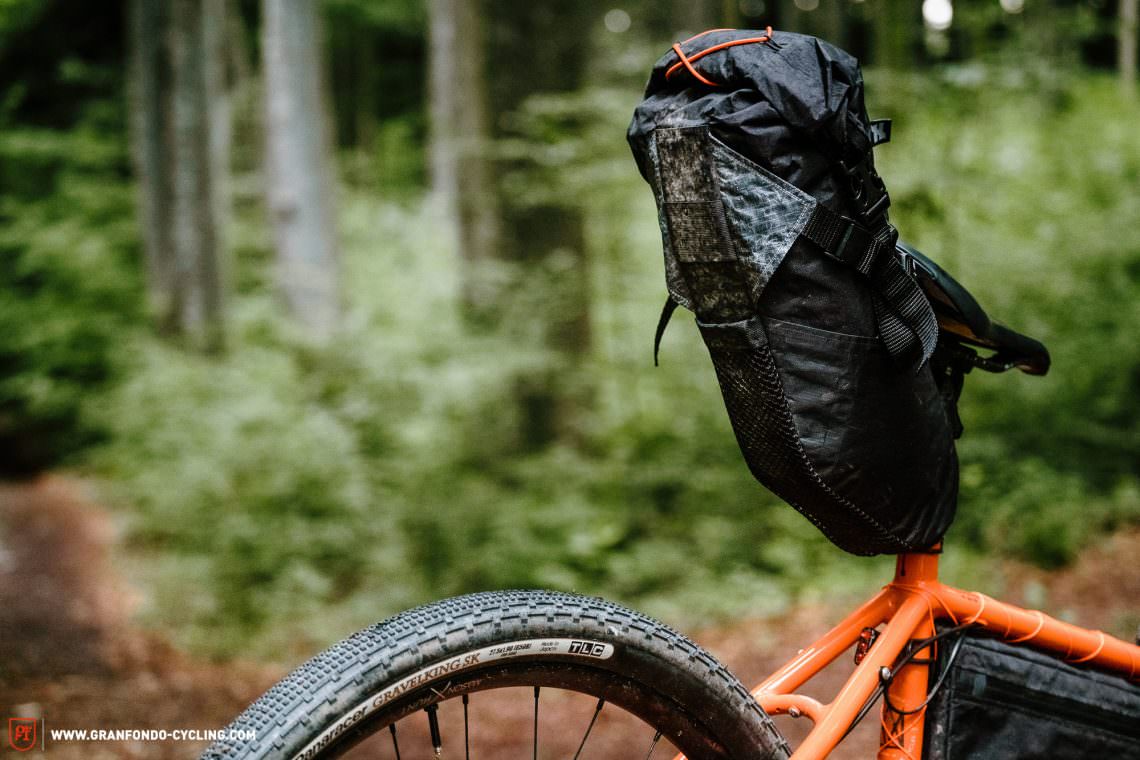
Bikepacking saddle bags with roll-top closures offer a packing volume of at least 5 l and they’re a lot bigger than regular saddle bags used for emergency tools and a spare tube. Some monstrous models even offer a packing volume of 15 l! Typically, saddle bags are constructed of a wedge shaped roll-top bag with straps that get attached to the rails of the saddle as well as the seat post. A welcome side effect of this is that it doubles as a mudguard. However, depending on the size of the bag, the quality of the straps and the carrying capacity, saddle bags have a tendency to sway from side to side as you ride. Bikepacking saddle bags that are oriented more vertically rather than horizontally tend to be less susceptible to this problem, especially if you’re careful in the way you pack the bag. A lot of models allow you to adjust the bags orientation to some extent thanks to the flexibility of the straps.

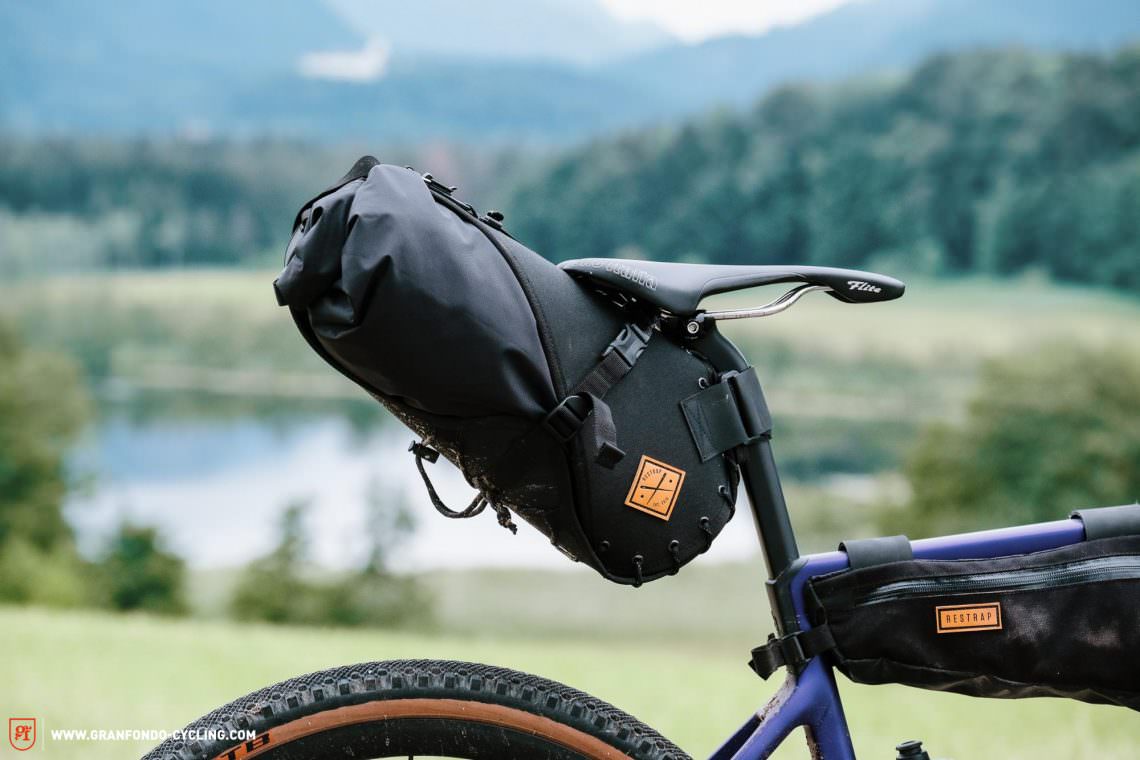

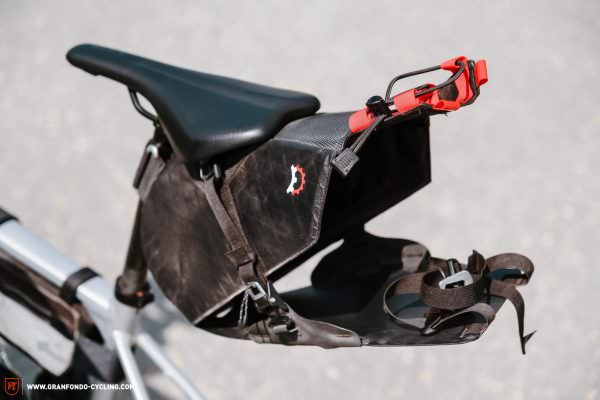
In an attempt to suppress any movement of the bag and making them easier to use, some manufacturers have come up with a two-piece saddle bag system consisting of a reinforced harness into which you strap either a purpose made bag or any other appropriately shaped bag, like with the Revelate Designs Terrapin. For maximum stability, some models feature steel rails along the base that get clamped to the seat post, as you’ll find on the Porcelain Rocket Mr. Fusion. Other models feature a stiffened mounting system that gets attached to the rails of the saddle, such as the Revelate Designs Spinelock. In general, it’s always best to make sure you compress the contents of the saddle bag as tightly as possible. That way the bag is less floppy and it also helps reduce lateral sway.
Saddle bags for dropper posts are specially constructed roll top saddle bags with narrower straps and additionally reinforced sections that are meant to act against lateral movement on bumpy, off-road terrain. Due to their more compact dimensions, which they have to have so that they don’t collide with the rear tire when you drop the saddle, these bags typically have less packing volume – you’ll be able to fit 7 l at most. You won’t be able to drop your saddle as far as usual either since the necessary strap will occupy about 2–3 cm of the dropper post stanchion. Saddle bags made for dropper posts often come with a seperate clamp (like the Wolftooth Valais) that gets bolted to the top part of the dropper post and functions as a mounting point for the strap of the bag. This provides for a more secure fit while also protecting the stanchion and seals of the dropper post. With the bag attached, you won’t have the same amount of space to move around in as without it, but even the slightest increase in freedom of movement will improve your confidence and control on technical descents.
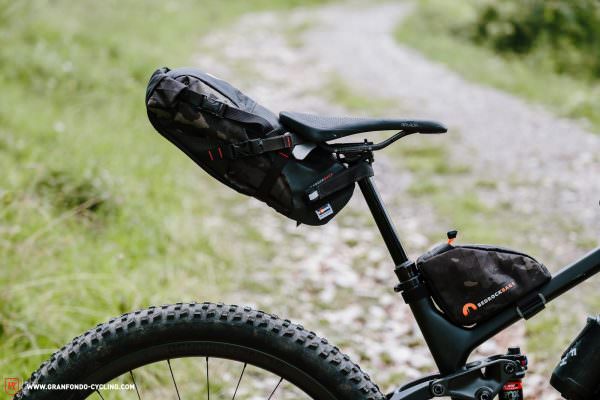
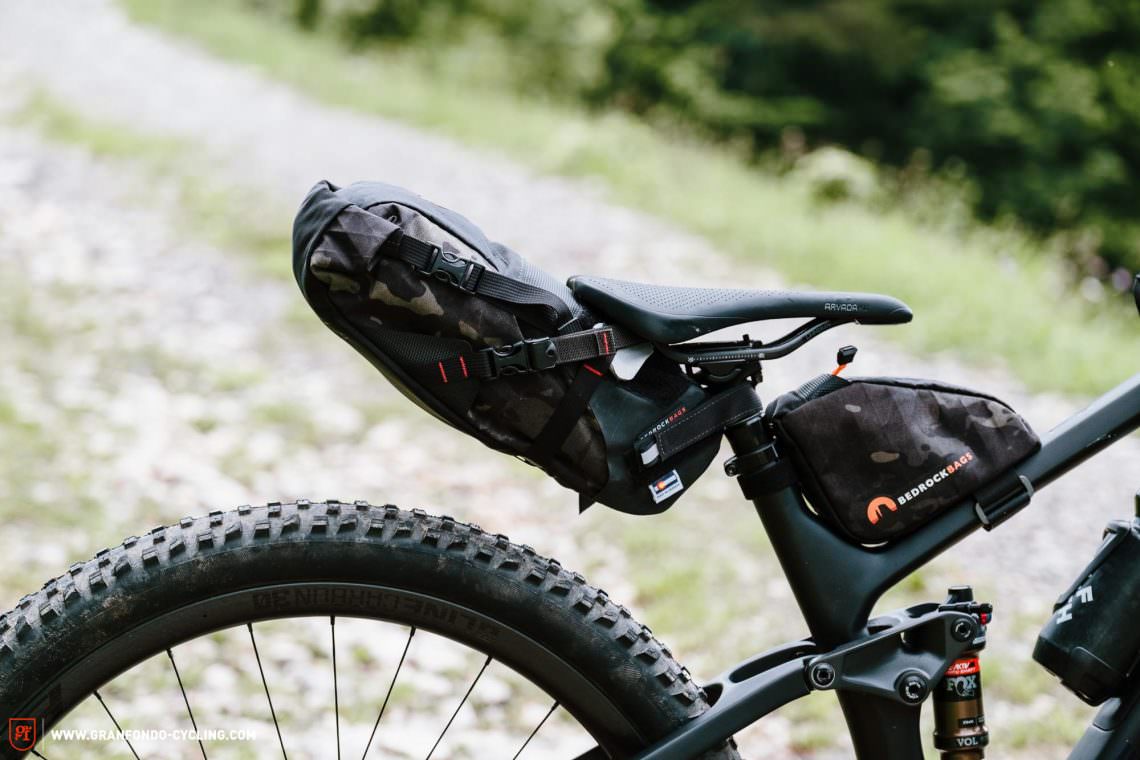
Examples of saddle bags for dropper posts include the Bedrock Bags Black Dragon, Revelate Designs Vole and Apidura Dropper Saddle Pack. The clamp used to protect your dropper post is available separately from Wolf Tooth, allowing you to use your existing saddle bag even if it isn’t designed specifically for use with a dropper post. Just remember to always leave enough room between the bag and your rear wheel with the post dropped all the way. If you’re on a full-suspension bike you will have to account for the additional travel of the rear wheel also. For the minimalists among us, the Rockgeist Gondola might be an interesting option to have a look at. This model avoids the seat post strap entirely as it gets attached only to the rails of the saddle, allowing you to insert the dropper all the way.
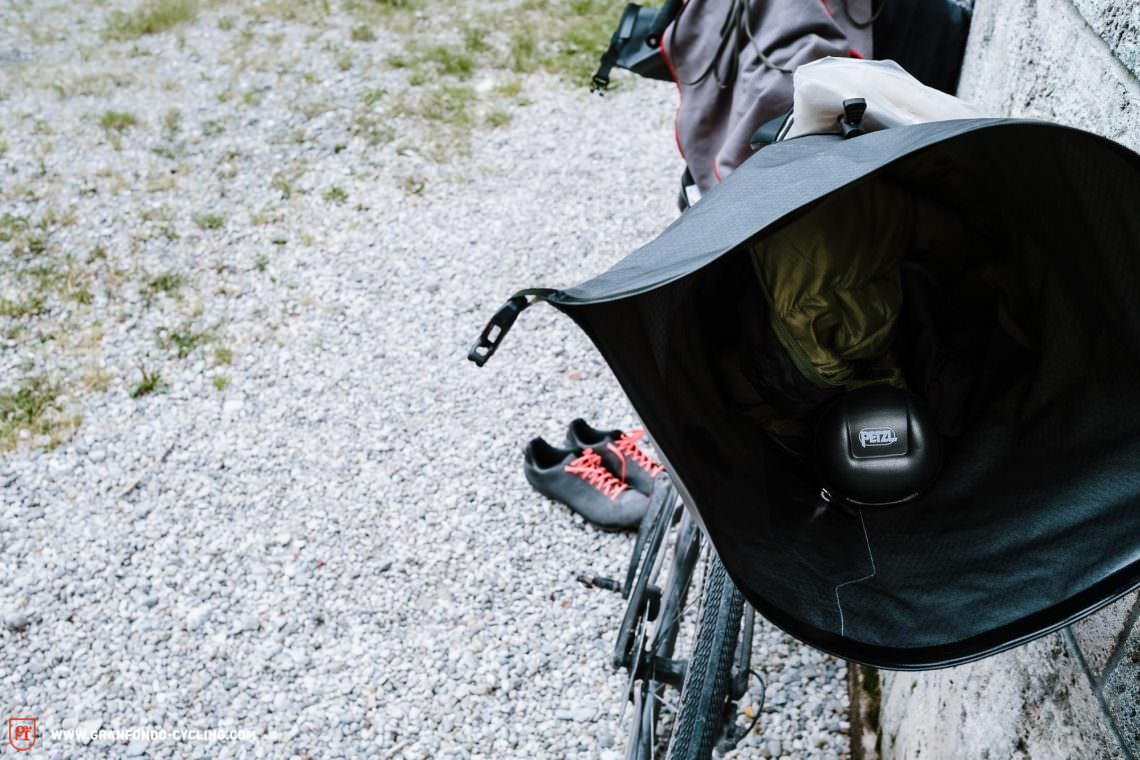
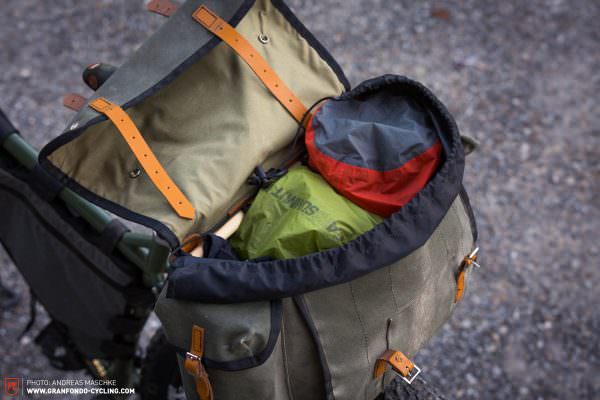
Wide saddle bags with flaps have been around almost as long as bicycles themselves. However, they’ve become a less common sight in the wild. Traditionally, they are made of thick, super robust cotton duck fabric, but these days you’ll also find modern interpretations made of high-tech fibers. Due to their wide design and the large flap, they’re much more comfortable to use than other saddle bags, especially when used frequently, as they offer a better overview and more targeted access. On the other hand, their bulky construction also restricts the performance of the bike a little more, so they’re best reserved for forest roads or gravel and only for easy-going trails. They get attached to the saddle or the bottom of the seat post. Depending on your riding position and riding style, the bag may come into contact with your thighs. However, in that case you’ll be able to get special brackets that keep the bag out of the way. Alternatively, you can use a small, compact luggage rack on which to rest the bag.
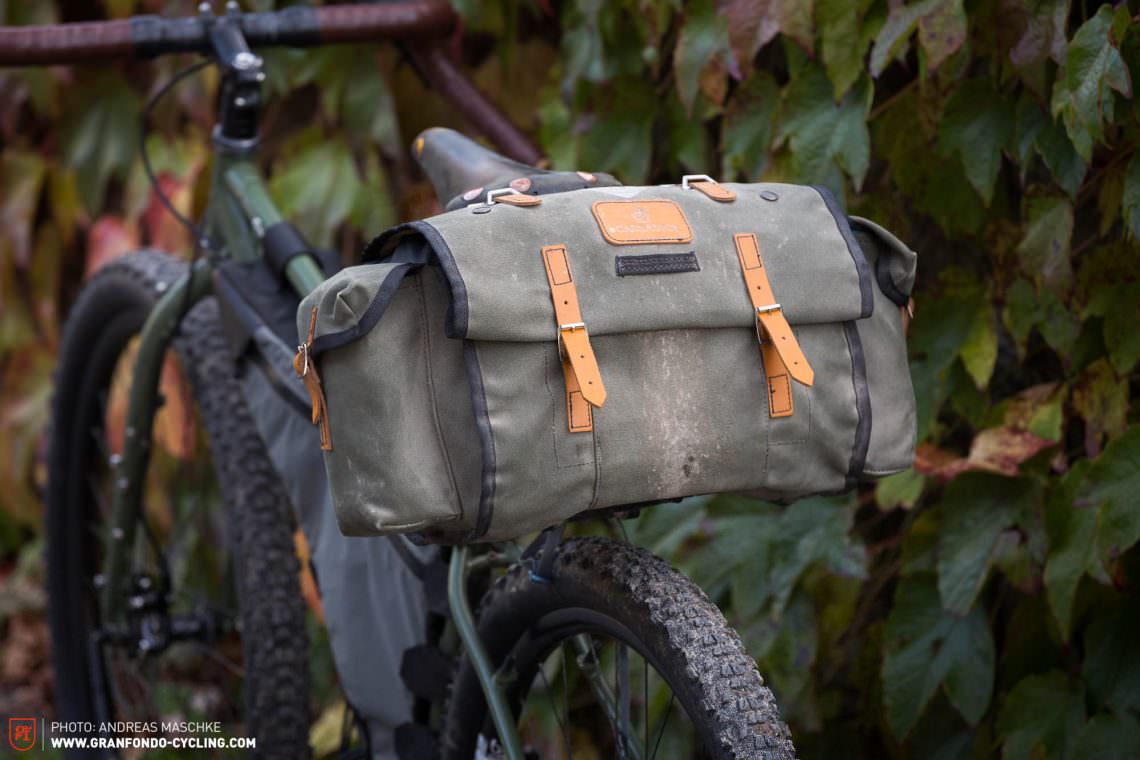
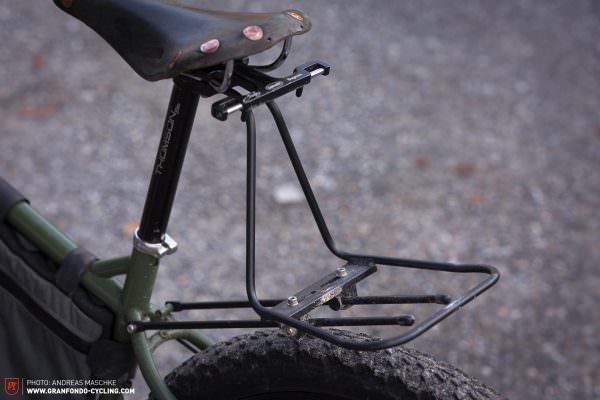
Most models with a flap can be used as a saddle bag as well as a handlebar bag. Those who prefer the classic look and feel will find what they’re looking for from Carradice and the modern interpretation is available from Swift Industries. If you’re going to use one of the larger models, it’s worth supporting the bag with a small, minimalist luggage rack, of which very good quality options are available from Nitto.
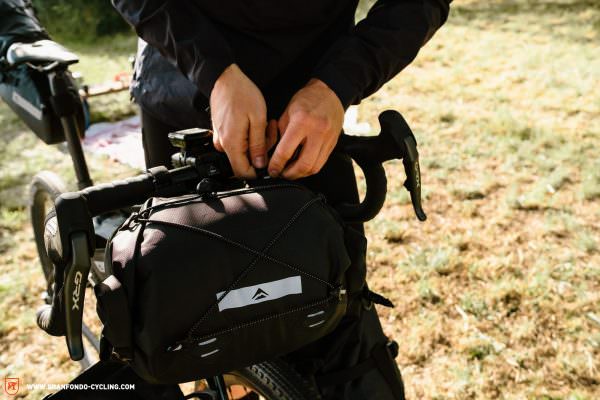
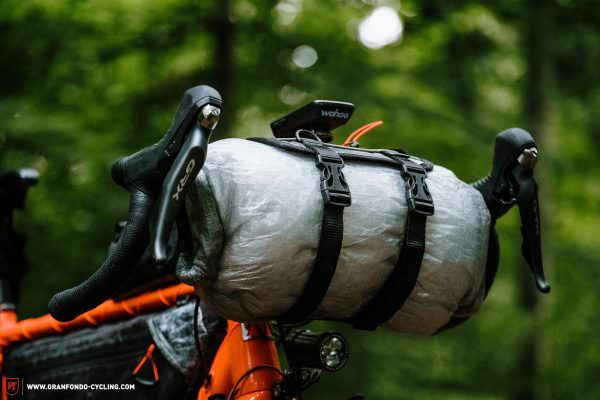
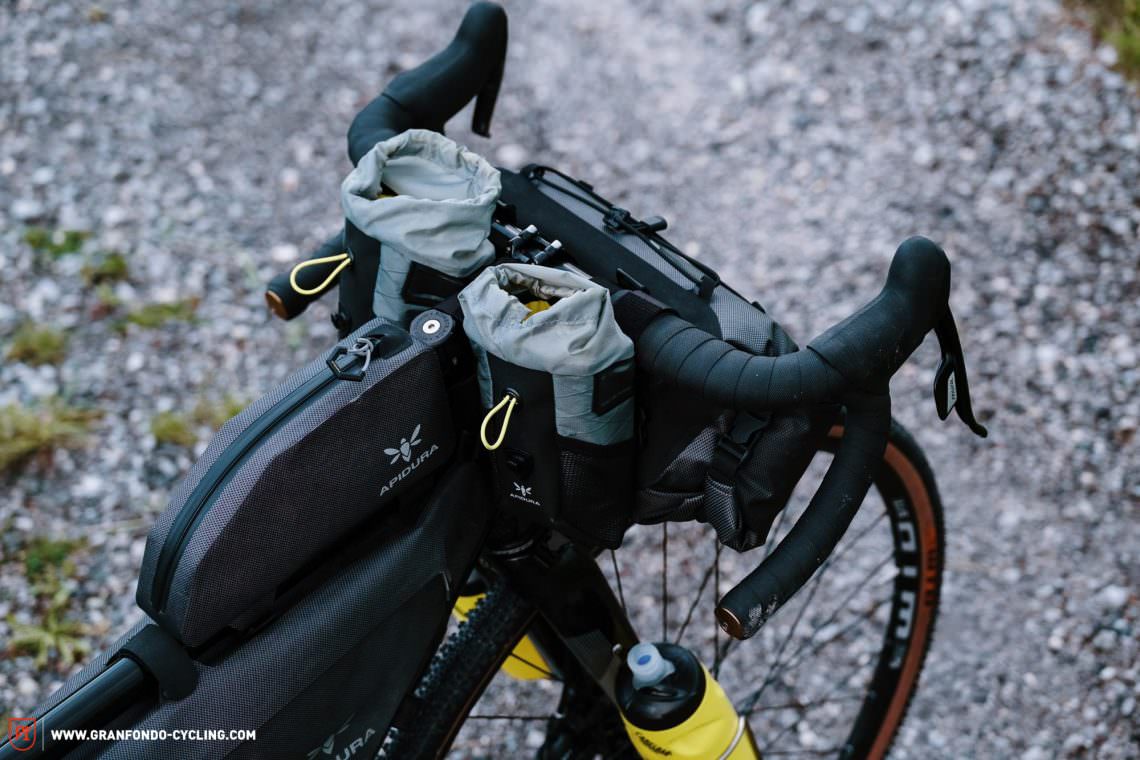
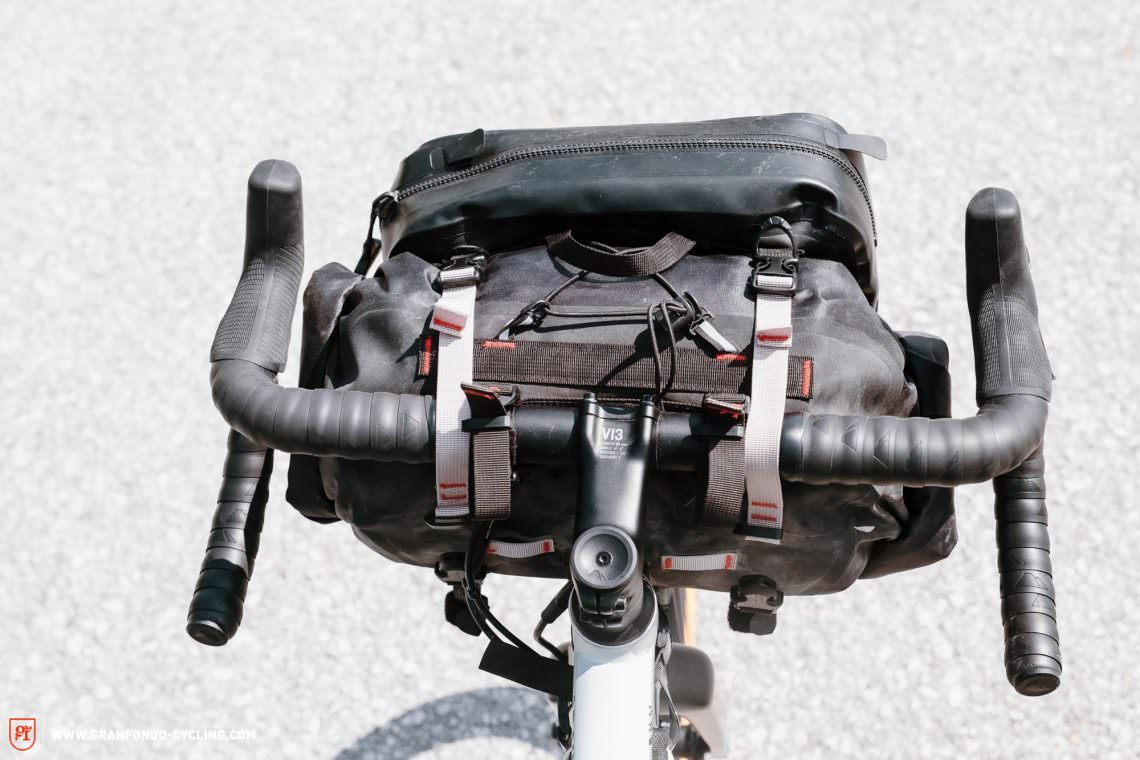
1.3 Handlebar bag
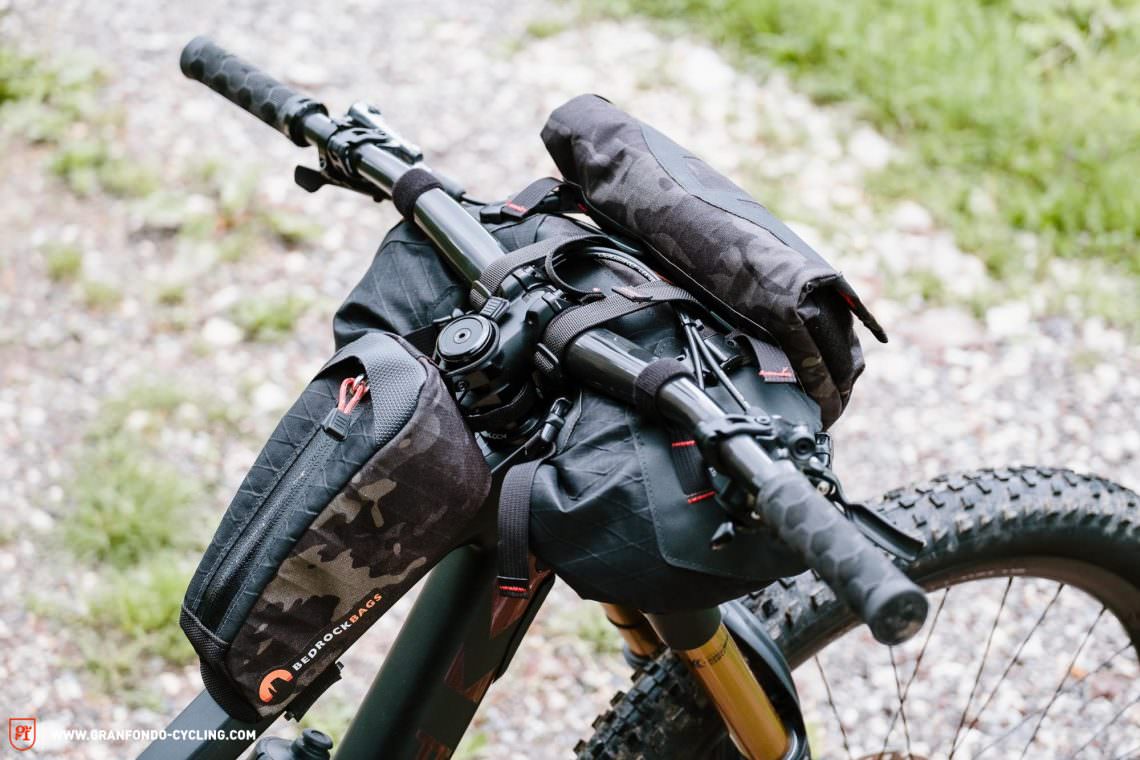
The bikepacking handlebar bag is your third large and usually completely waterproof storage space. Here you have the choice of several options that you can attach directly to the handlebar without a rack. The simplest option is a special bag with roll-top openings at both ends and integrated straps for the handlebar. Their disadvantage is the fixed size or diameter of the bag, though you’ll usually have two sizes to choose from. They’re also a bit awkward to fill as the entire bag usually has to be removed from the handlebar. Good examples of handlebar bags would be the Revelate Designs Sweetroll, the ORTLIEB Handlebar-Pack, the Apidura Backcountry Handlebar Pack, the super minimalist Rapha Waterproof Bar Pack or the Roswheel Road Handlebar Bag. The Bedrock Bags Moab is a model specially designed for MTBs. Unlike regular handlebar bags, it curves around the stem and has two additional attachment points for the handlebar on the outside. This makes it sit a lot more securely. It’s also smaller in diameter in order to work with the short head tubes or long-travel forks of modern mountain bikes.

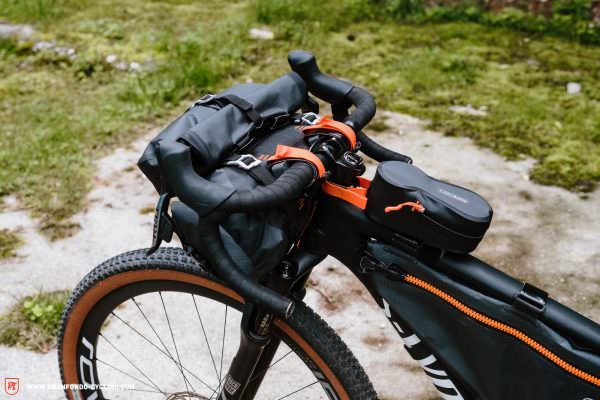
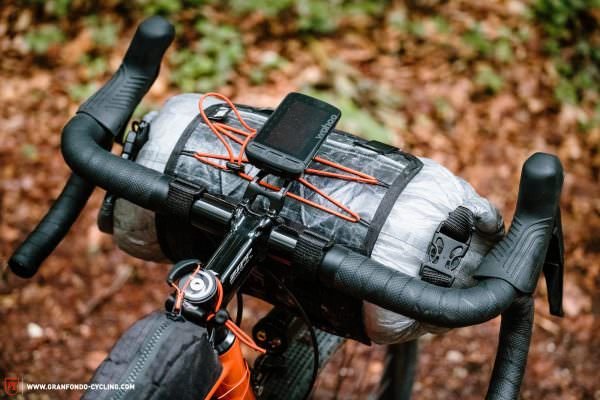
Instead of a one-piece system, you can also resort to using a harness on the handlebar. The principle is the same but the carrying system and the bag are separate from each other. This not only enables the use of a bag with your desired dimensions and features, but also makes packing much easier. However, compared to bags with integrated straps, this system is usually heavier and somewhat bulkier. The harness is available separately without the bag from Revelate Designs among others, or with a special bracket to keep it away from the handlebar from Rockgeist.
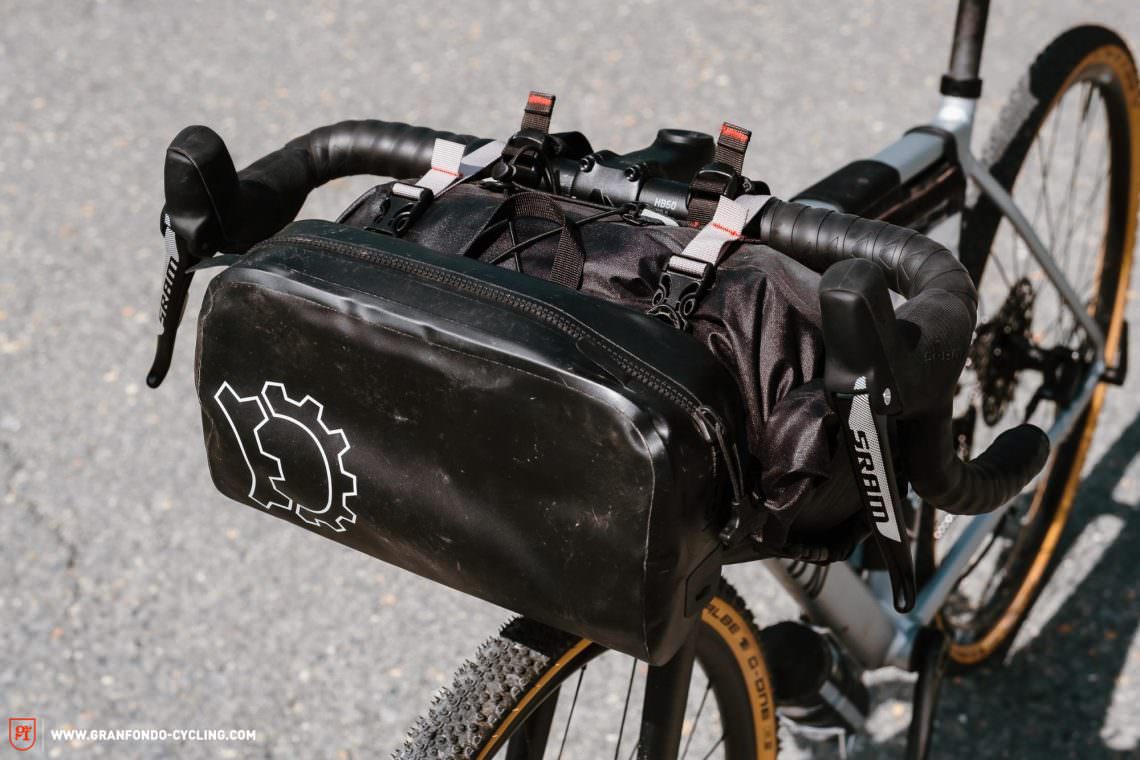
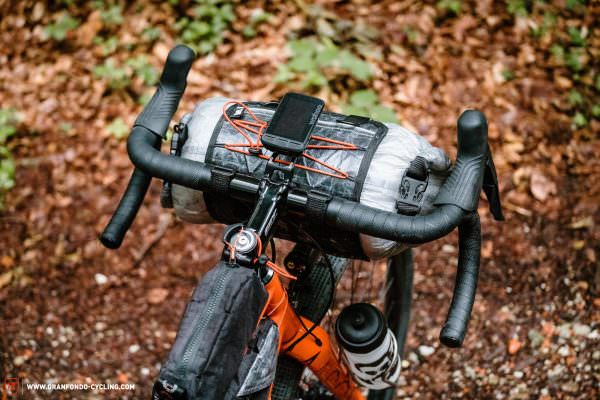
An additional front pocket can usually be attached to both types of handlebar bags. In most cases all the bags are sold separately, but some manufacturers also offer complete packages consisting of a harness, the drybag and an additional pocket, such as from Restrap. Alternatively, you’ll also find front pockets with integrated straps for a bag, going with a more minimalist approach. They are a little less stable than a harness, but therefore they’re the lightest option. Examples include the Revelate Design Egress, the Rockgeist Apogee or the Wanderlust Piñon.
The third option in addition to the one-piece bag and harness systems are traditional saddle bags with flaps as mentioned above, the vast majority of which can also be used as a handlebar bag. They are ideal for those who don’t need a drybag and would prefer having increased packing space and more versatility. However, this option is also the heaviest. You’ll find good models from Swift Industries or BXB. For a more classic look and feel, we recommend having a look at Carradice.
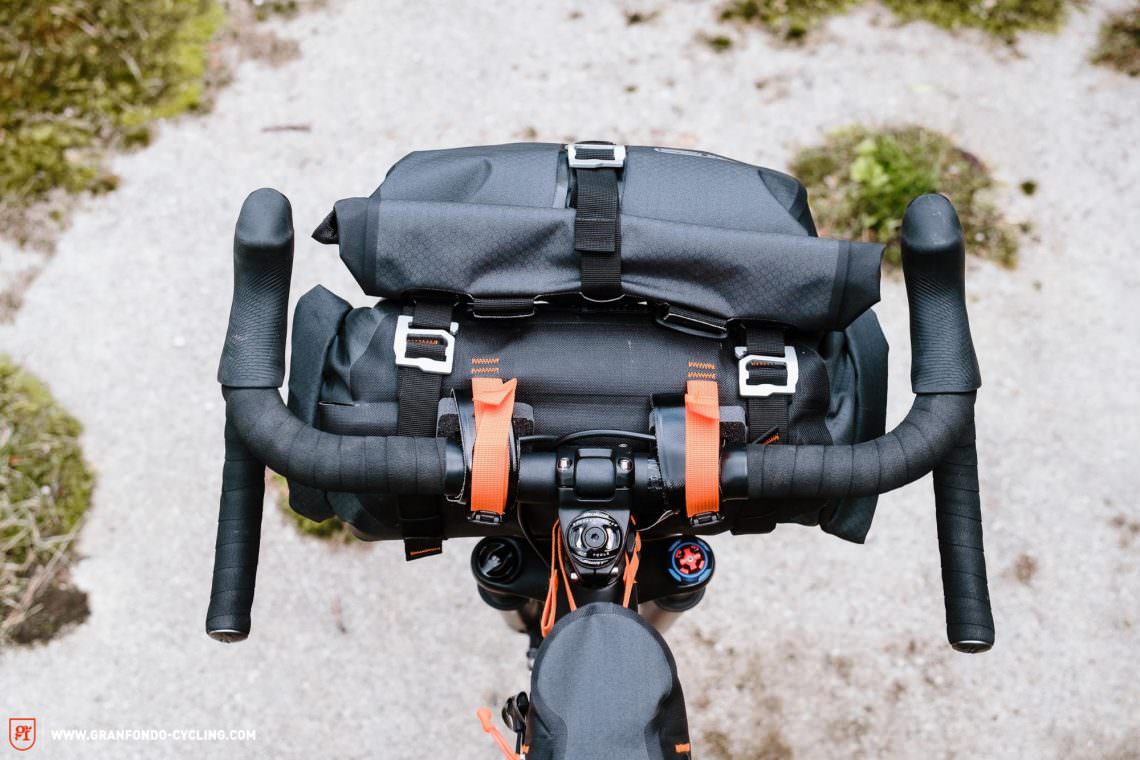
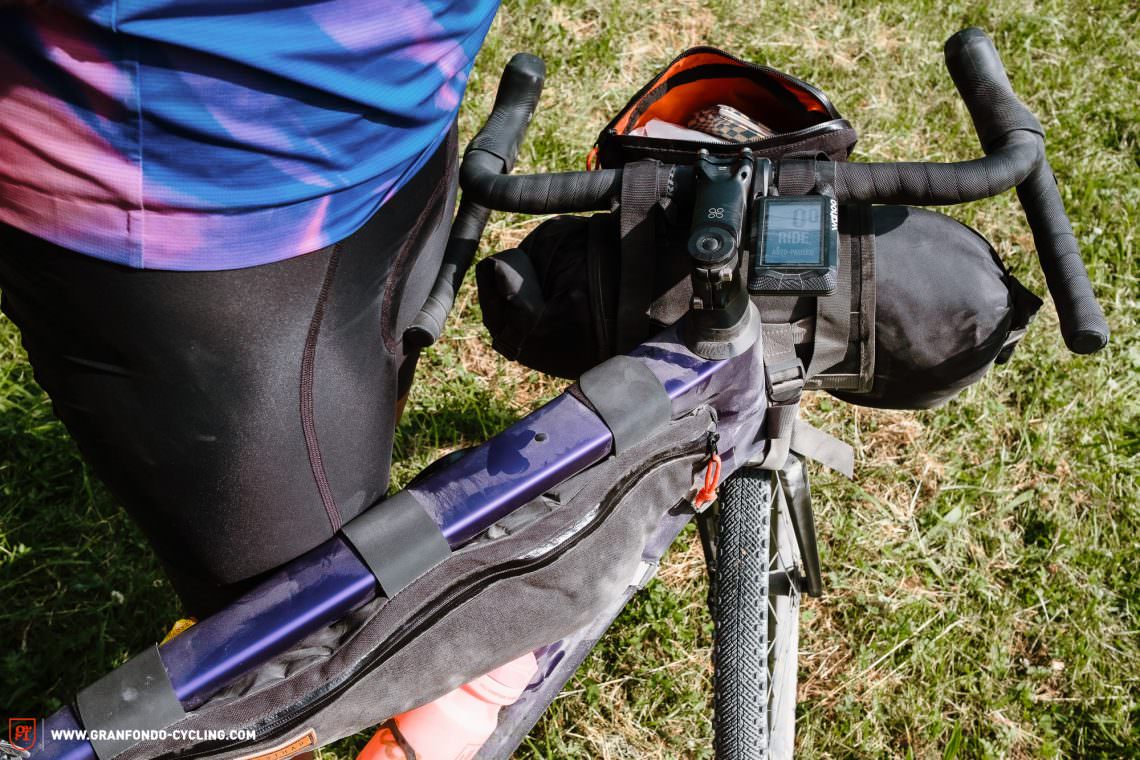
In general, make sure that the dimensions of the bag fit your handlebar and that the bag doesn’t interfere with the brake levers or with the handlebar itself in the case of drop bars. On bikes with a suspension fork, you should also keep an eye on the diameter or the height of the bag so that it does not get caught on the tire as the fork compresses. Whatever type of bag you resort to, you have to attach it to the head tube somehow (don’t forget the protective tape) so that it doesn’t bounce up and down. Finally, make sure that your brake lines and shifter cables run neatly behind or over the bag and that they don’t bend too sharply or rub against the frame. If necessary, replace them with longer ones.

1.4 Additional pockets
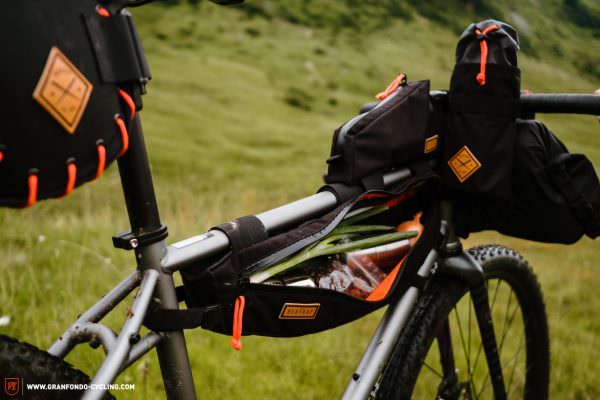
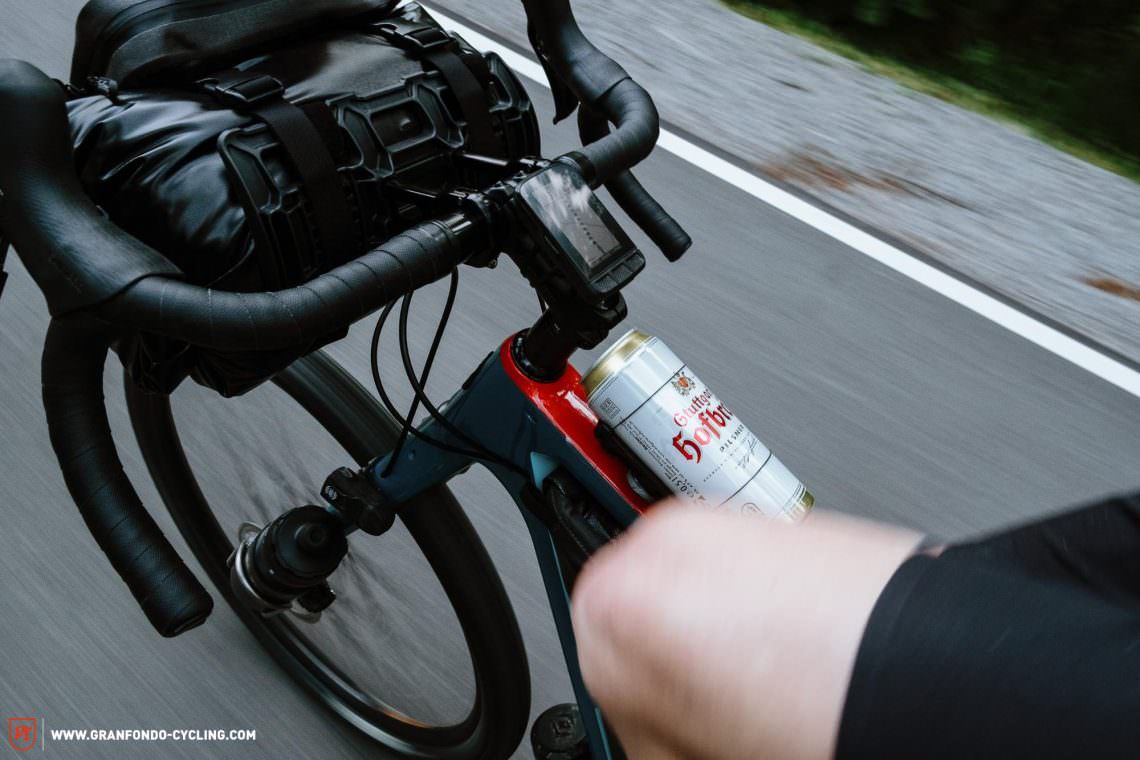
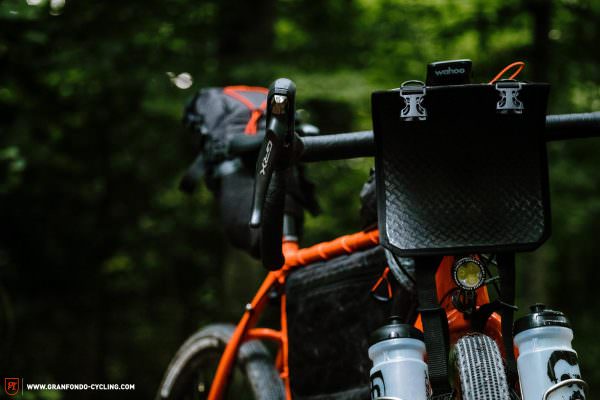
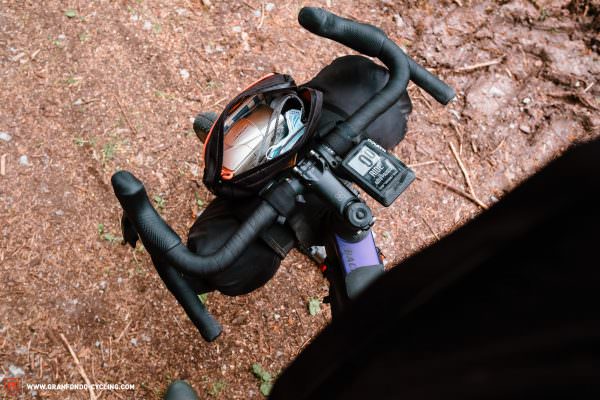
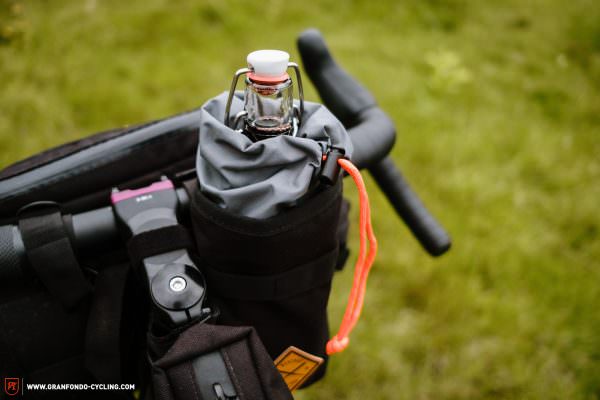
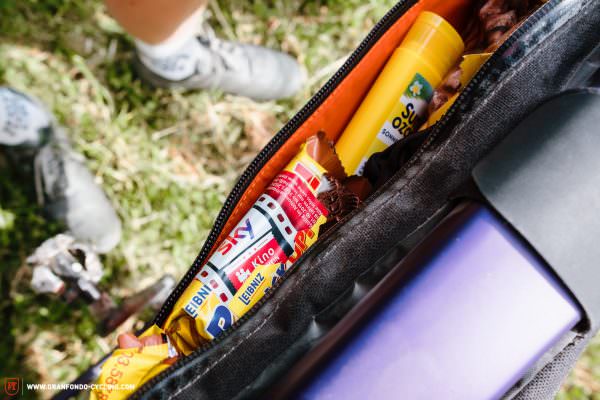
To increase your packing space and divide up your equipment better, it is advisable to use a few small additional pockets. So-called stem bags are perfect universal bags for the cockpit. They get attached to the left and/or right side of the stem and offer quick access to snacks, additional water bottles or other items such as your phone and gloves etc.

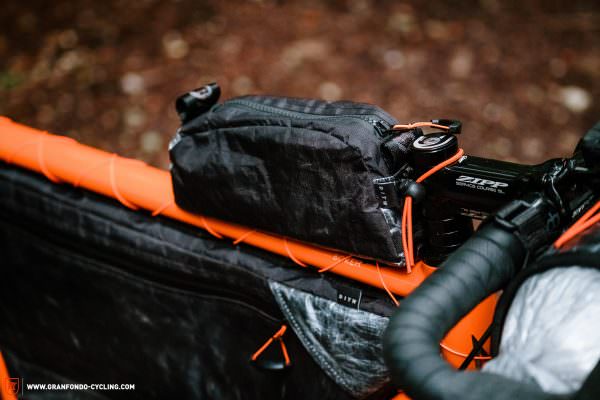
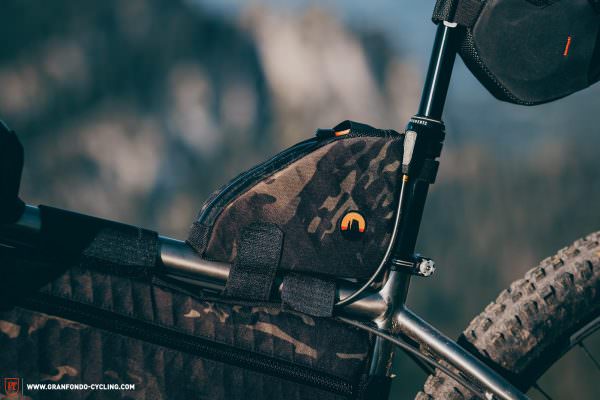
Another recommended bag is the top tube bag. As the name suggests, it sits right behind the stem where it gets strapped or bolted to the top tube (provided the frame has the appropriate bosses). In contrast to the three main bags, the range of brands, models, shapes, colours and sizes are almost limitless for both stem bags and top tube bags. Good examples of top tube bags from more established manufacturers include the Apidura Racing Top Tube Bag or, for maximum space, the Revelate Designs Mag-Tank 2000. For stem bags we recommend having a look at the Bedrock Bags Tapeats, the Apidura Backcountry Food Pouch or the Revelate Designs Mountain Feedbag.
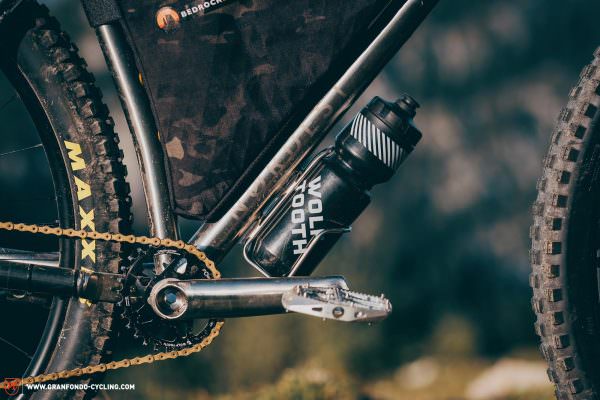
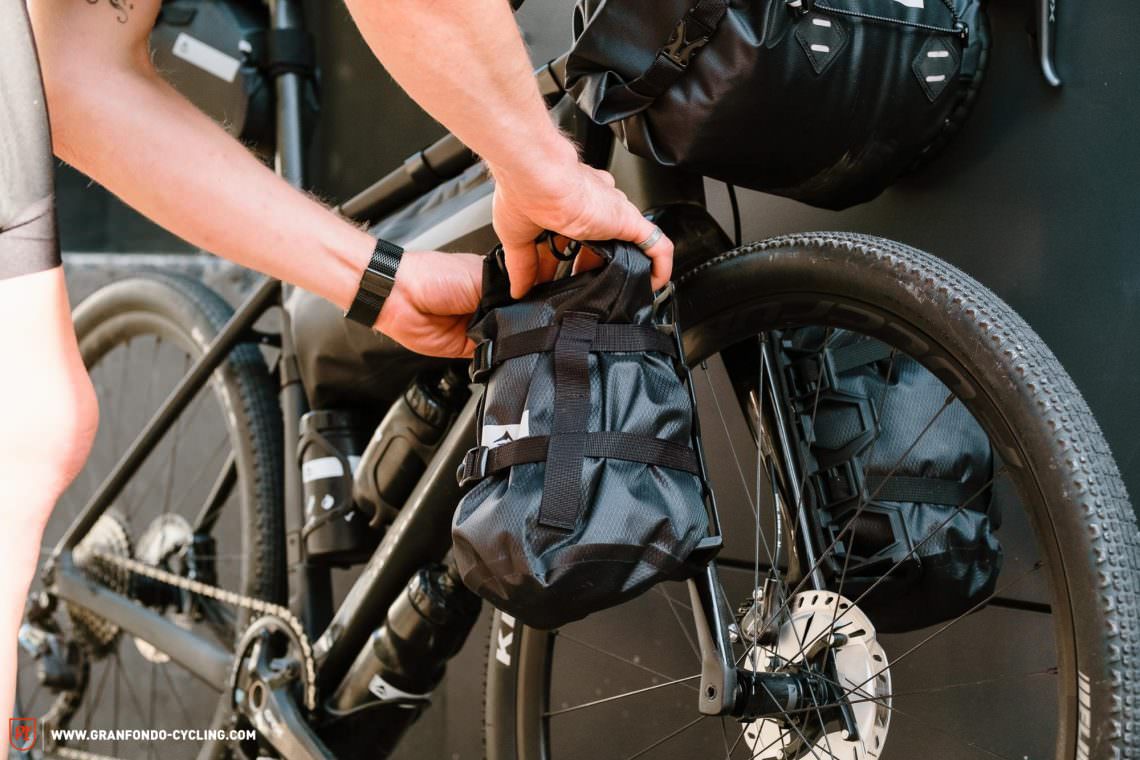
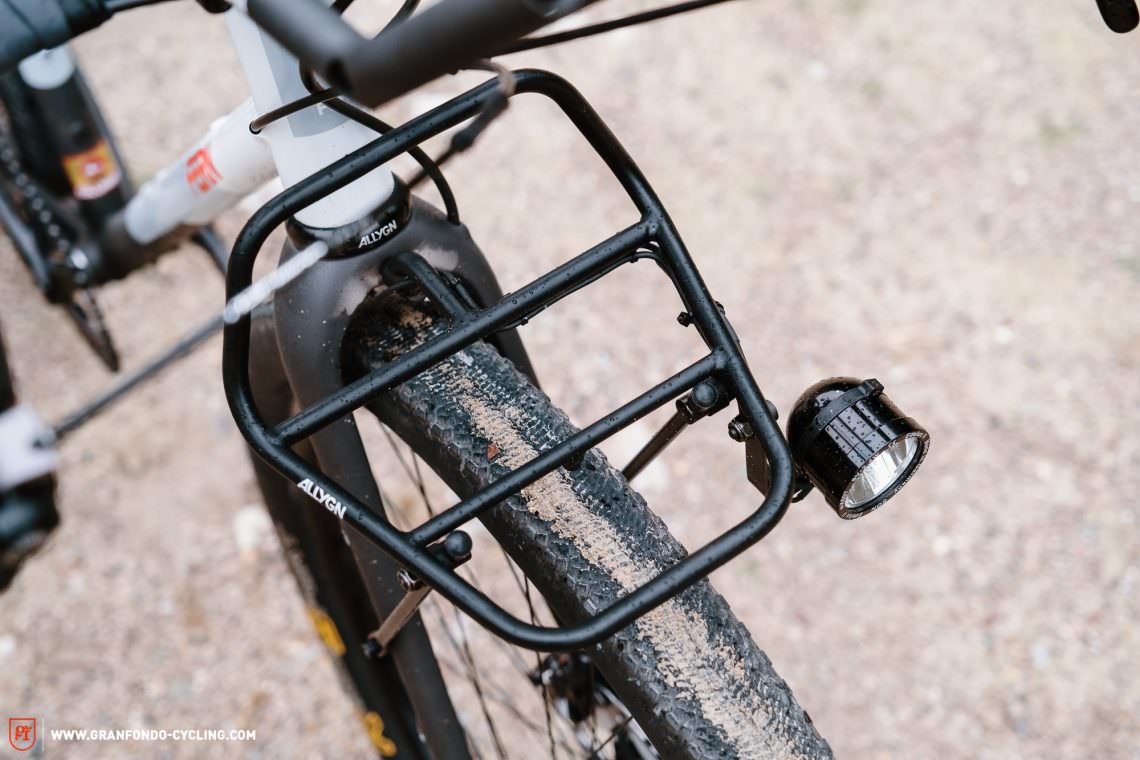
If that still isn’t enough, you’ve got mounting points on the fork or under the down tube and you’re not using them for bottle cages, you might be interested in so-called cargo cages, like the Salsa Anything Cage HD, King Cage Many Things Cage, Blackburn Outpost Cargo Cage or the Topeak Versacage. In principle, you can attach anything here: a sleeping bag, tent, large water bottles, any compression sack or whatever else you can think of. For a more stable and compact system, you can resort to specially constructed bags such as the Salsa Anything Bag, the Revelate Polecat or the Apidura Expedition Fork Pack. Pockets that you can attach freely allow you to be more versatile in the way you configure your setup, such as the Apidura Expedition Down Tube Pack.

1.5 Racks: randonneur, porteur, basket, mini-pannier
That’s it for bikepacking bags that don’t require a rack. For a little more storage space on asphalt or smooth gravel or for improved everyday practicality, it can also make sense to use a traditional metal rack.
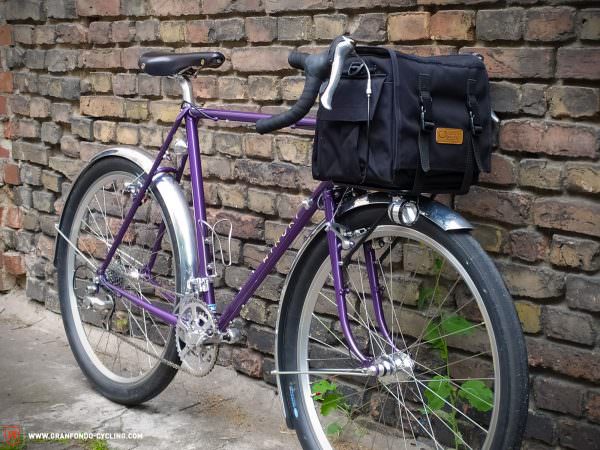
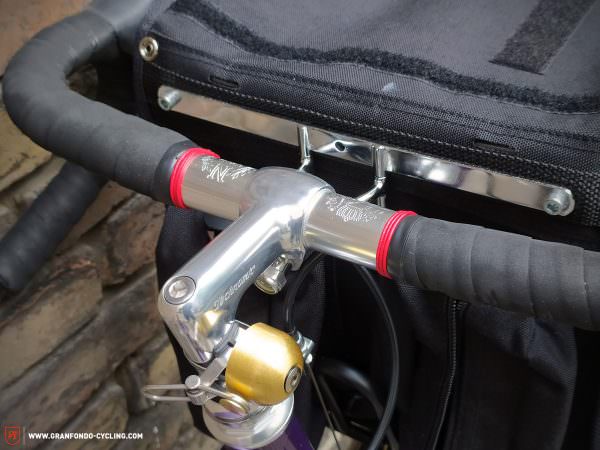
Randonneur bags are a classic and they’ve remained almost unchanged for a century. You can attach it to a quill or modern stem via a bracket called a decaleur and it’s often supported by an additional minimalist luggage rack such as offered by René Herse Cycles or Velo Orange. Classic randonneur bags made of duck cotton and leather are available from the likes of Berthoud Cycles, but you’ll also find modern interpretations from Swift Industries. If you don’t want to resort to using a decaleur, your alternative option would be a wide porteur rack as available from Soma, Surly or Rivendell/Nitto. These work well with bags like the Restrap Rando Bag or the Surly Porteur House Bag.
Classic wire baskets are back in trend too, such as those available from Wald Sports. Some resourceful bag manufacturers including Wizard Works, Swift Industries, Porcelain Rocket
or Dark Realm produce bags that are purpose made for these baskets.
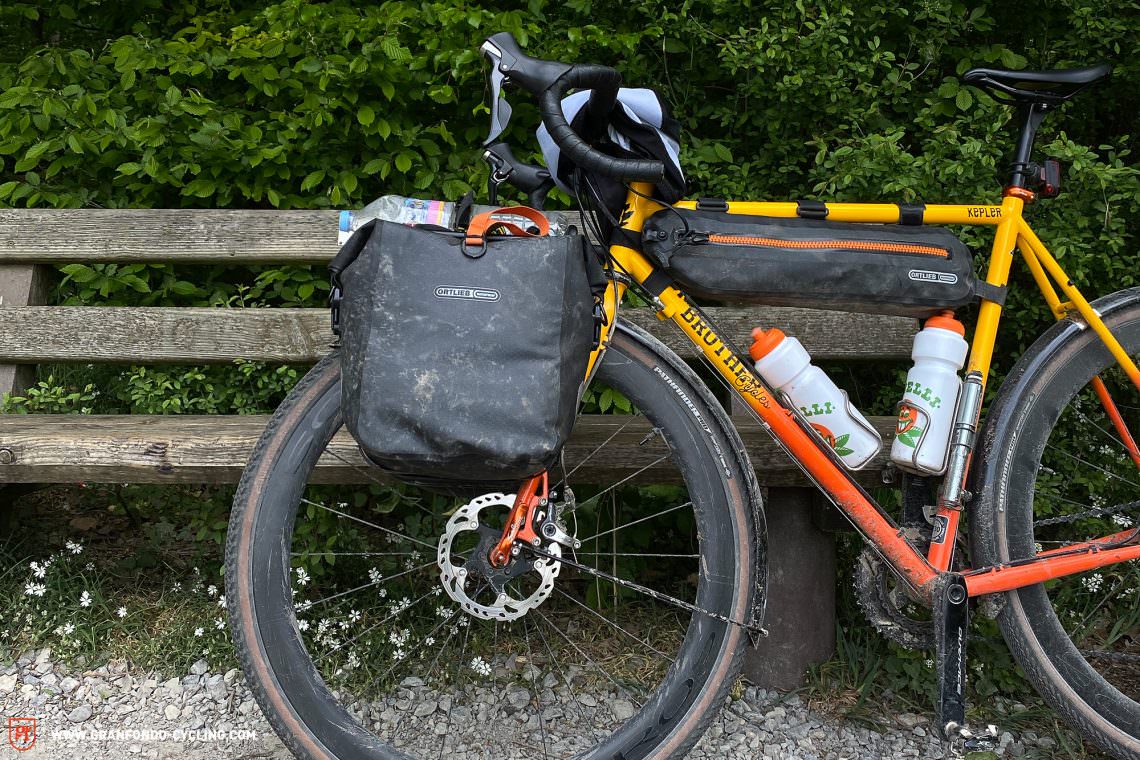
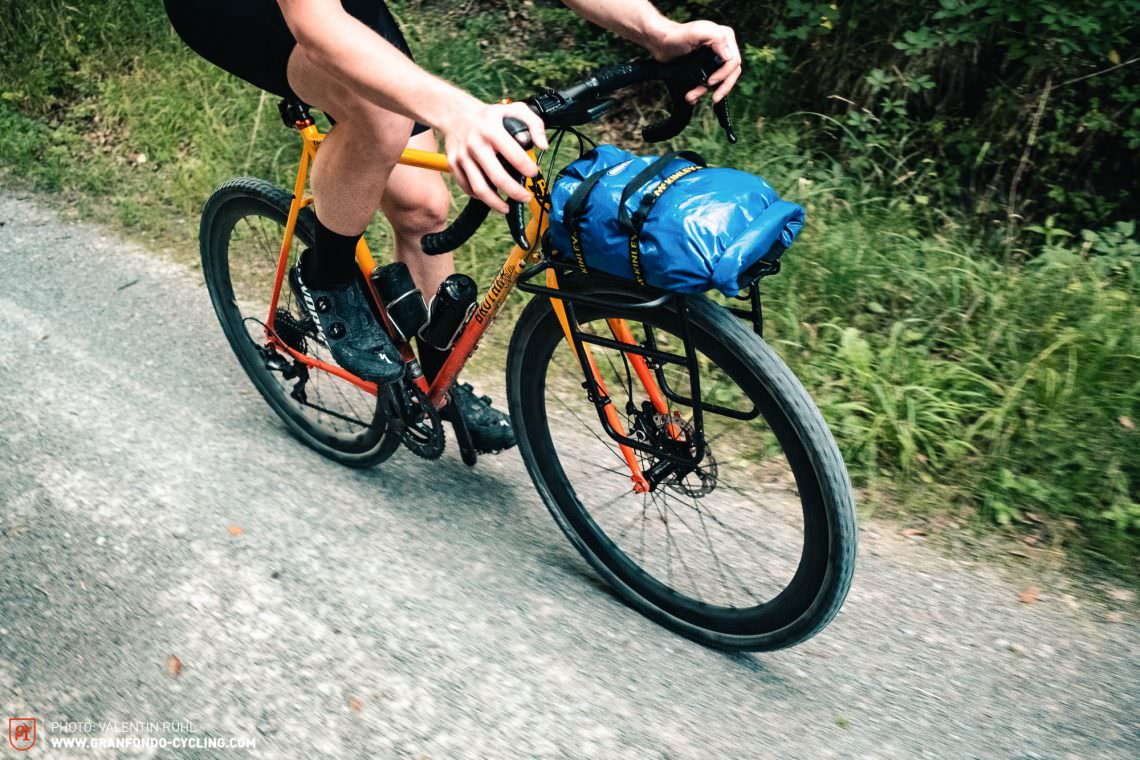
For all those who would prefer to stick with a traditional touring bike setup or require additional storage space in addition to their bikepacking bags, the market has responded with more compact and smaller versions of classic panniers. They aren’t as wide, keeping the center of gravity closer to the bike. Some examples of mini-panniers include the Revelate Nano Panniers, the Porcelain Rocket Microwave Panniers, the Restrap Small Panniers or the ORTLIEB Gravel-Pack. Tubus make light and robust luggage racks that pair well with mini-panniers.
2. Affordable alternatives
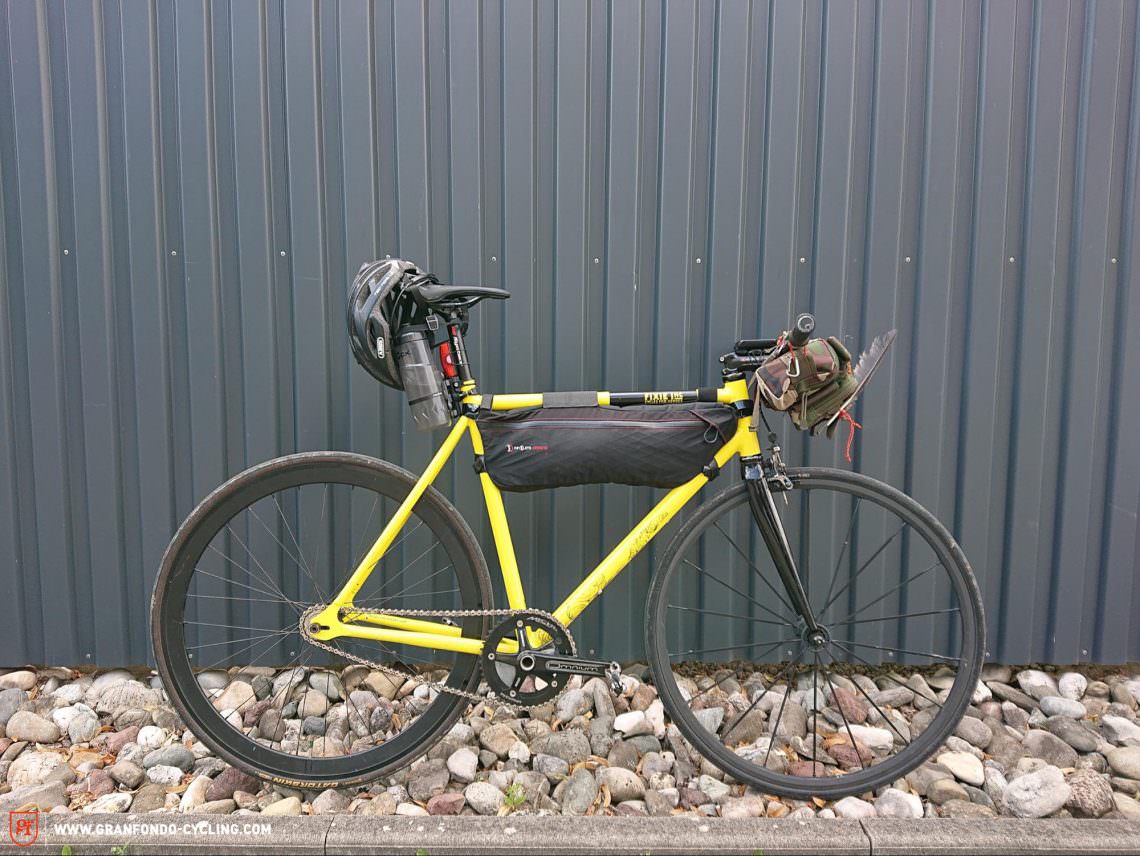
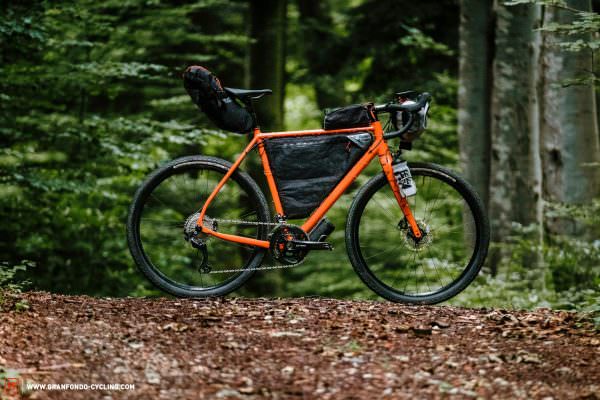
You still aren’t sure which bags to buy or just want to save some money? Then there are a few more affordable ways to transport your luggage. Drybags are available in all imaginable shapes and sizes and don’t cost much, from Exped or Sea to Summit, for example. You’ll also find slightly more expensive models that feature compression straps, attachment points or high-tech fabrics. With a couple of straps such as the popular Voile Straps, they can be attached to the handlebars, the seat post or in the front triangle. This is not the most convenient solution, but it is very light and you can create a complete set-up with three bags and straps for less than € 100. If your budget allows for more than that, we recommend you take a closer look at the Revelate Designs Egress for the handlebar. This allows you to attach any bag to any type of handlebar with the added bonus of a waterproof compartment that’s easily accessible. Unfortunately, there are no cheaper options of this design as all other brands only offer these types of bags as accessories for their handlebar bags and they don’t function as standalone products.
A simple setup can cost less than € 100.
If you have a sewing machine and the skill, you could sew the frame bag yourself or simply attach a couple of sturdy straps to a drybag. There are materials available online at Extremtextil and you’ll find simple instructions here. Depending on the material, you should come in well under € 100 for a DIY frame bag. To make space for it in the front triangle, simply move the bottle cages to the fork. If your fork doesn’t have the bosses for it, simple attachments such as the Topeak Versamount work with almost all diameters. They’re inexpensive and offer a great solution, especially for suspension forks. The only thing cheaper would be to use cable ties and duct tape. 🙂
The cheapest, albeit most uncomfortable solution is to use the backpack you already own. It will do for a last-minute overnighter, but after a full day in the saddle you will know exactly why people use bikepacking bags…
3. Water resistance, lightweight construction, durability – a brief lesson in the science of materials
When you know what you need, it’s worth investing a little more money in a good set of bikepacking bags. At first glance, cheap bags typically rely on simple, cheap materials, especially for the zippers and Velcro fasteners. They’re usually not very well thought out either. Accordingly, they don’t keep their shape and they’re not waterproof/weatherproof, suitable only for occasional trips in good weather. High-quality aftermarket models usually feature purpose made materials or laminates originally designed for sailing, mostly X-Pac from Dimension-Polyant. These are both highly water repellent and lightweight, with individual brands focusing on one of the two factors. Areas that are particularly exposed to stress are often reinforced with Cordura or Hypalon and plastic inserts are used to make the bag more stable and hold its shape. Setting the standard for maximum lightweight construction is DCF (Dyneema Composite Fabric), also known as cuben fiber. However, the material is very expensive and bags made from it are almost only available as custom-made products from one of the countless small manufacturers.
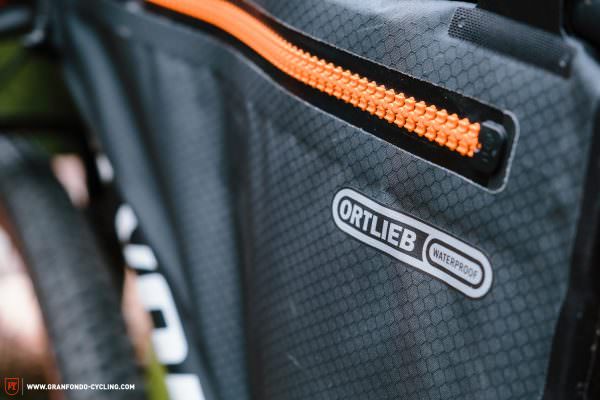
Very few bags are 100% waterproof. For that, all seams would have to be sealed with special tape or the materials welded together, as is the case with ORTLIEB’s products and Porcelain Rocket’s 52Hz bag. However, most bags are highly water-repellent and the contents stay dry even in normal rain. But, since there are no guarantees, it’s worth putting more sensitive contents into lightweight drybags such as the Sea to Summit Ultra-Sil Nano or a classic freezer bag. That also helps you keep everything organised. Saddle bags and handlebar bags are much more likely to be fully waterproof, as most models rely on the same principle as a drybag with a roll-top closure.
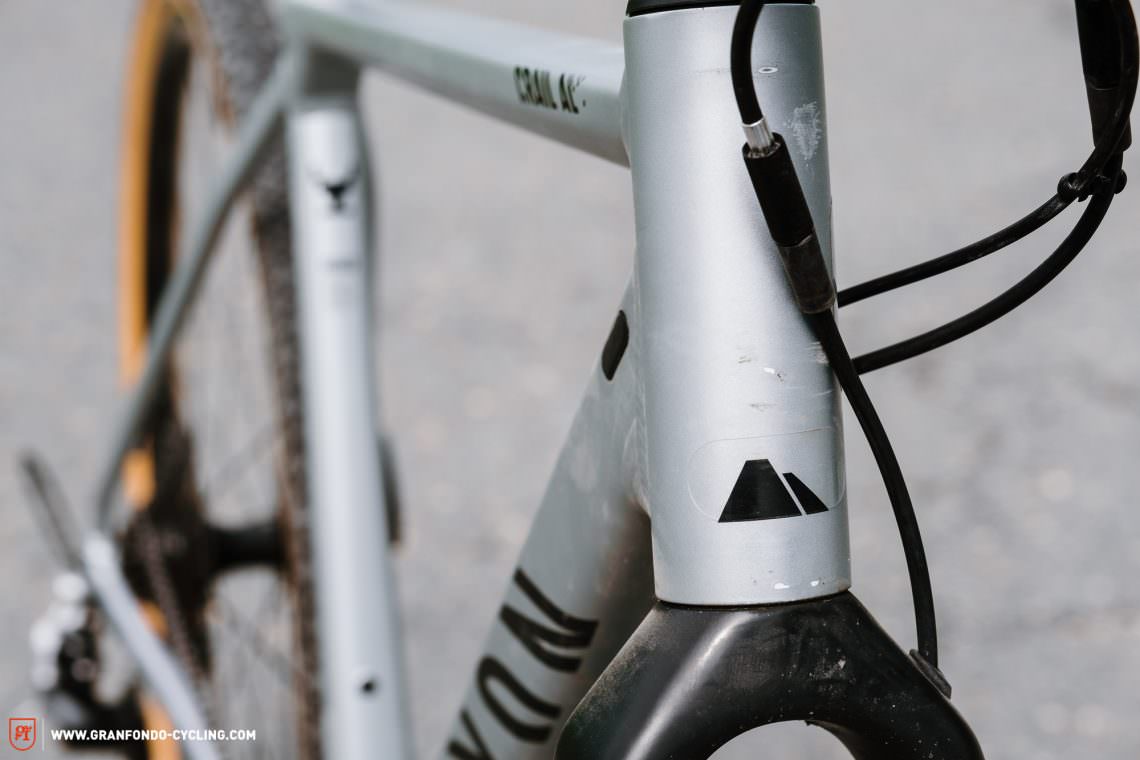
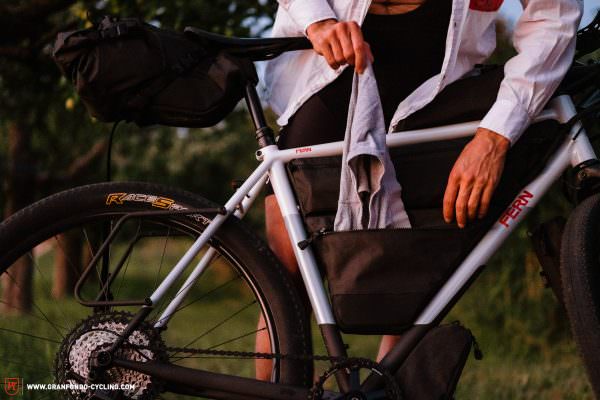
Beware of chafing! Be sure to cover all contact points on the frame with protective tape.
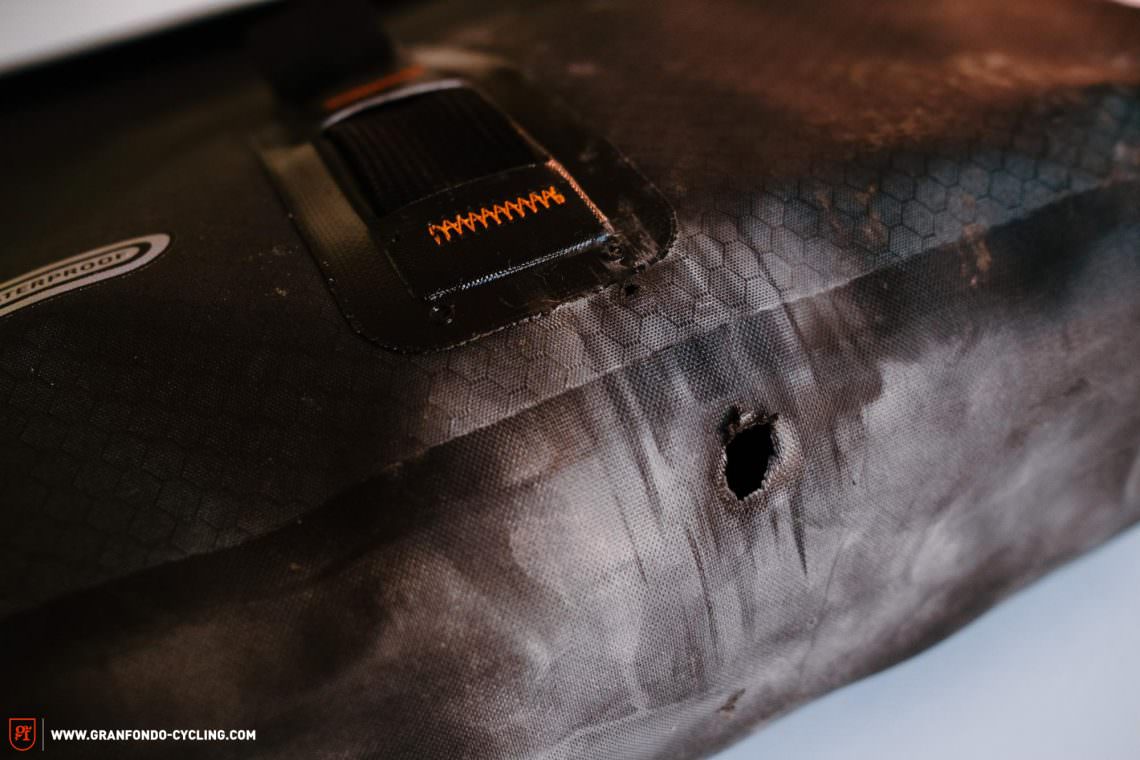
Make sure the bags and straps don’t rub against each other or that anything rubs against the tire! Lightweight materials in particular might be extremely tear-resistant, but they can quickly get worn through from chafing. The same applies to your bike: protect all areas that come into contact with the bags – especially the frame and handlebar – with protective film such as that from AMS AllMountainStyle, DYEDBRO or invisiFRAME. Otherwise, the paintwork and carbon parts will wear down before you know it…

4. Which bags do I need?
Each trip is different. Individual preferences, the weather and the route heavily determine what and how much you have to take with you and, accordingly, how many bags you need. However, we’ve come up with four scenarios that should cover most situations
You don’t need much for a day trip without an overnight stay. A rain jacket or windbreaker, one or two accessories, tools, a few snacks if you’re going to stop for bigger meals on the way, or food for the day. In most cases, a 6 litre saddle bag is big enough for all of this. Alternatively, a half frame bag in combination with a top tube bag or a small standalone handlebar bag such as the Rapha Bar Bag could do the job just as well.
A weekend adventure or an overnighter with an outdoor overnight stay requires a little more clothing, food, utensils and, above all, your camping equipment. In that case you will have to upgrade the small handlebar bag to a large handlebar roll or a bag with integrated straps. We recommend a combination with a small front pocket for quick access to snacks or your mobile phone. Of course, you can also resort to a stem bag or a top tube bag instead. Together with a saddle bag and a half frame bag, you should have enough packing space without having to relocate your two bottle cages in the front triangle. Alternatively, you could do without the frame bag and handlebar roll, replacing those with a wide bag on the handlebars like the BXB Teardrop plus a normal saddle bag.
If you want to go on a real bikepacking holiday, you can’t avoid the full set of three main bags plus most of the additional bags. You’ll also require a full frame bag. The bottle cages will have to migrate to the fork or the down tube or you can put your water bottles in a set of stem bags, although it is advisable to only use one stem bag and leave the second one for snacks etc. Alternatively, you can rely on a hydration bladder on your back or in the frame bag. For a little more comfort and more capacity, you can also consider replacing either the saddle bag or the handlebar bag with a traditional wide model with a flap.

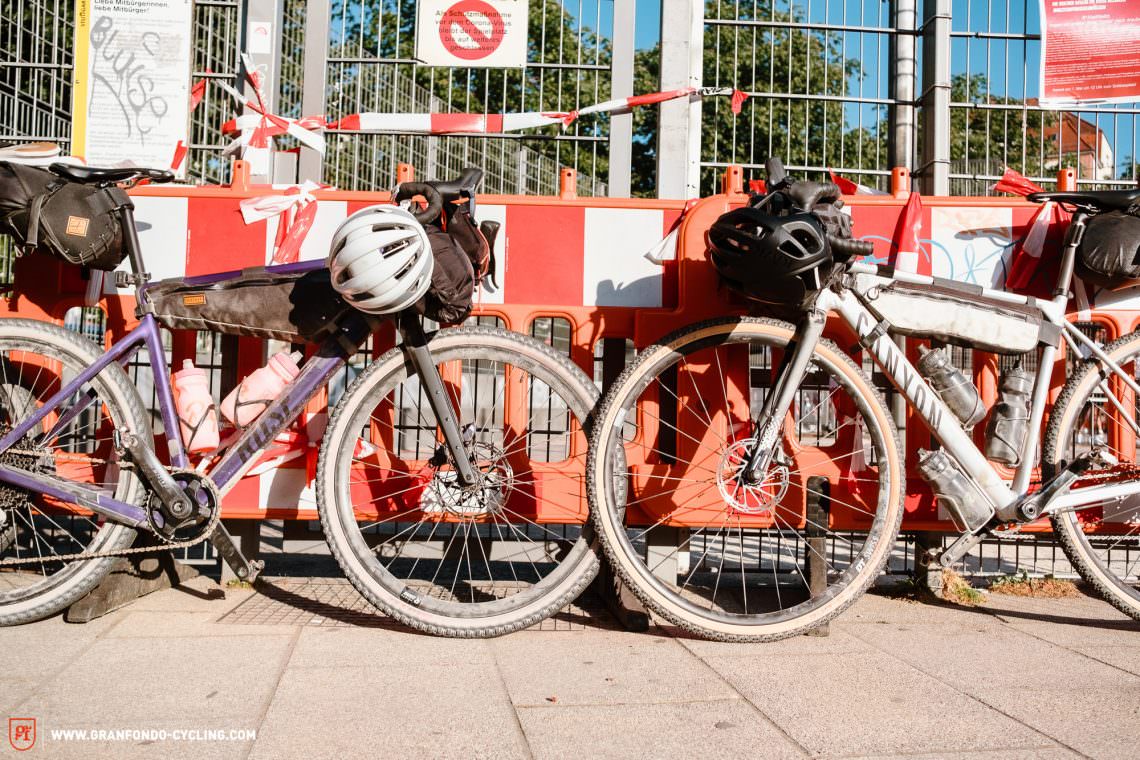
For trips lasting several weeks or several months you need at least the same setup as your would for a week. Depending on the time of year, you might need even more packing space. Since trips of this nature usually involve less technical routes, it’s worth seriously considering the use of wide saddle bags for the front and rear. Alternatively, minimalist luggage racks with small panniers or cargo cages with the corresponding bags can also make sense in this case. However, you’re unlikely to head straight into that kind of adventure, but rather increasing the distances and days gradually, allowing you to get a feel for how much packing volume and what type of bags you need.

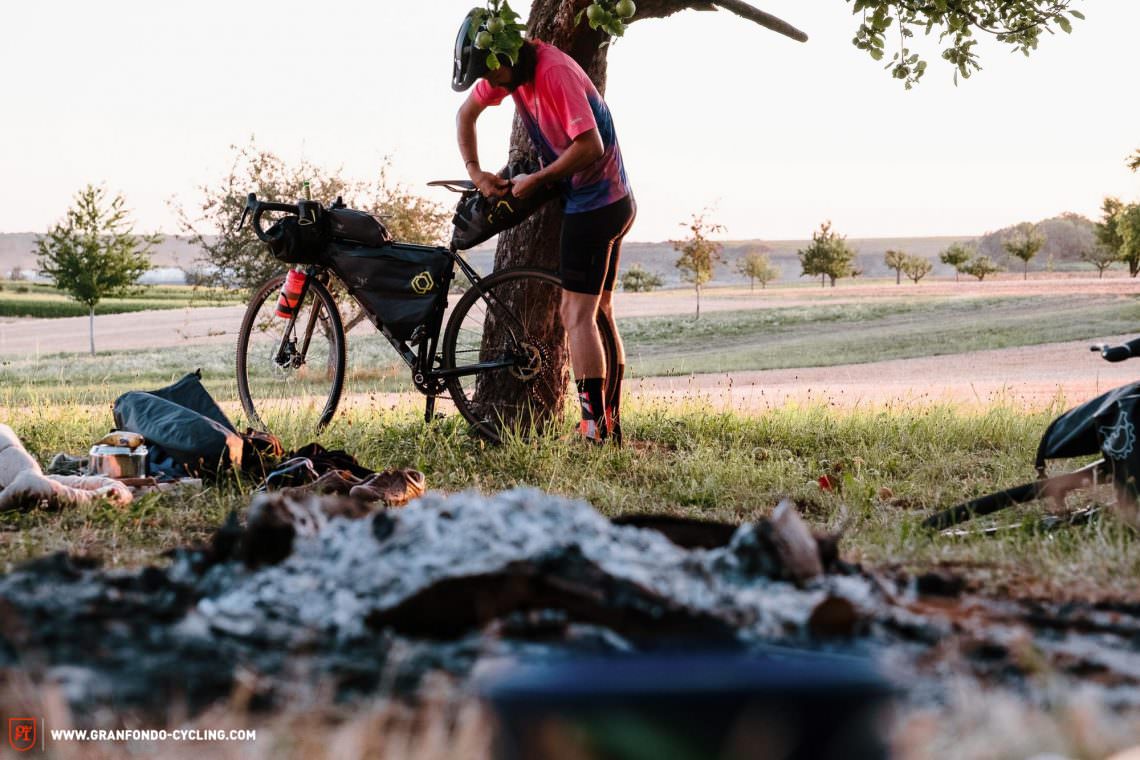
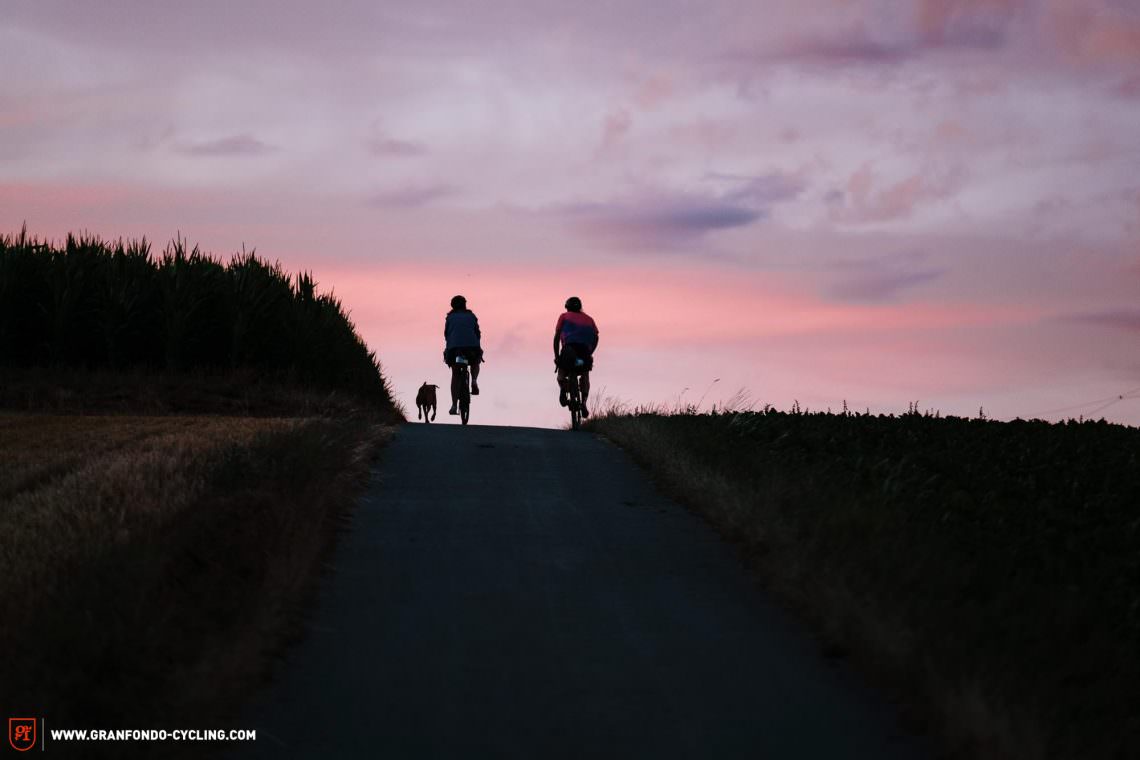
Practice beats theory. Just try it out and you’ll quickly find out which bags you need.
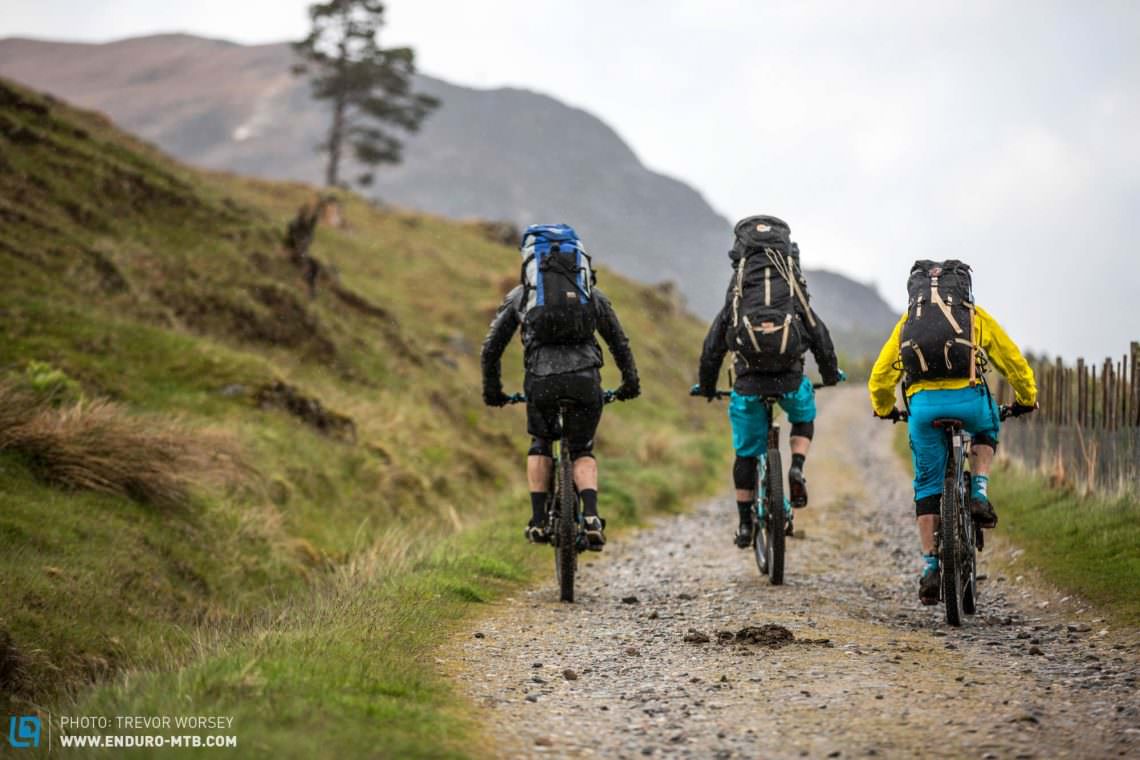
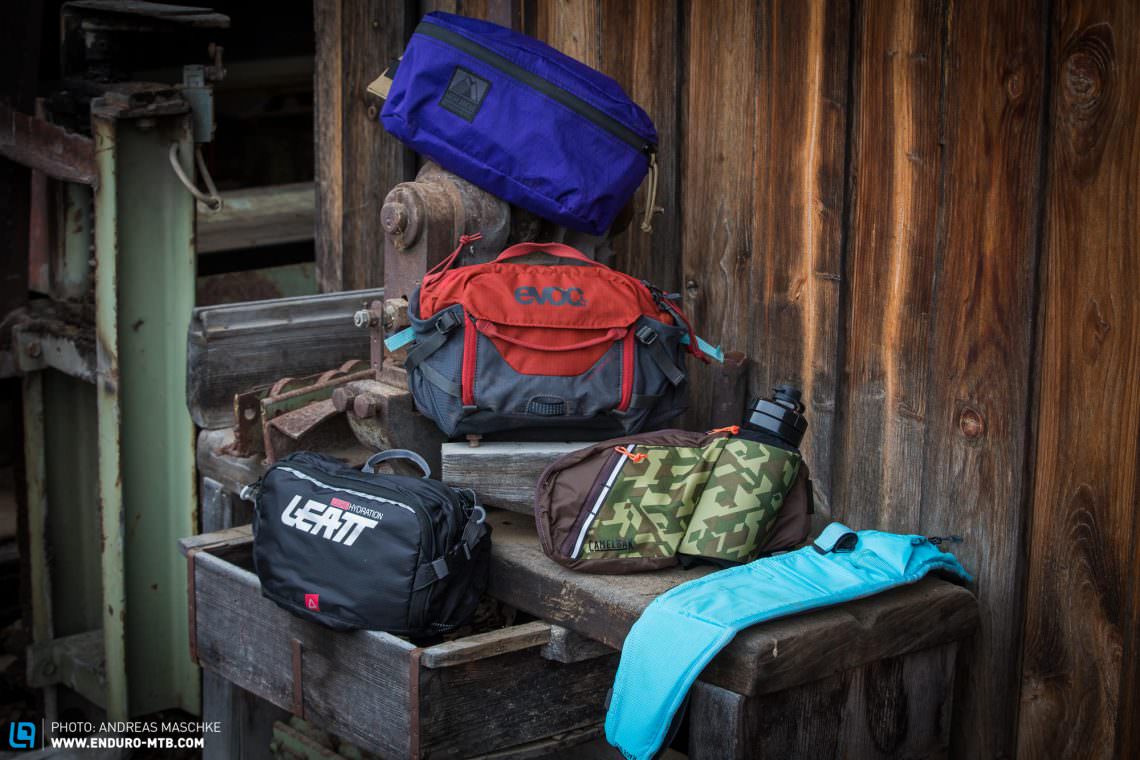
As mentioned before, personal preferences and packing requirements vary greatly. Some people get by with very little, others want to be prepared for a whole week on an overnighter. The only thing that helps here is trying out different setups and after a few trips you will have figured out what you really need, what you can’t do without and what is the most comfortable setup for you. By the way, hip bags are a simple way to increase your packing capacity on any type of ride. They offer space for a windbreaker, small items or water and it’s also the most vibration-free way to transport a camera. Unlike a backpack, they can do all this without any major discomfort. You’re guaranteed to find a model that suits you in the huge ENDURO group test featuring 24 hip bags!
5. The best complete set
Of course, the best complete set will always be a tailor-made custom set, as you can have every detail adapted to your needs and your bike. However, a made to measure kit isn’t cheap and it often involves longer lead times.

The easiest and most stress-free way to buy bikepacking bags is a complete set from one of the major brands such as Apidura, Revelate Designs, Restrap, or ORTLIEB. You’ll find their products in stock and available immediately at local bike shops around the world or online. They’re made of robust materials and offer sophisticated performance. We put a variety of complete sets from different manufacturers to the test for you and selected our favourites. You’ll find the specs of the different bags that we tested listed below the pictures that follow. Most manufacturers offer a much larger portfolio of products besides the ones shown here and some of them differ significantly in their function and design. As such, we recommend looking at and comparing the websites – mixing & matching might not look as stylish, but function takes priority in this case.
Revelate Designs bags
| Revelate Designs | |||
|---|---|---|---|
| Tangle Frame Bag | 3.5 l | 260 g | € 129.99 |
| Terrapin System Seat Bag | 14 l | 580 g | € 209.99 |
| Yakataga Dry Pocket | 4.3 l | 264 g | € 169.99 |
| Sweetroll Handlebar Bag | 18 l | 472 g | € 139.99 |
| ø | 39.8 l | 1.576 g | € 649.96 |
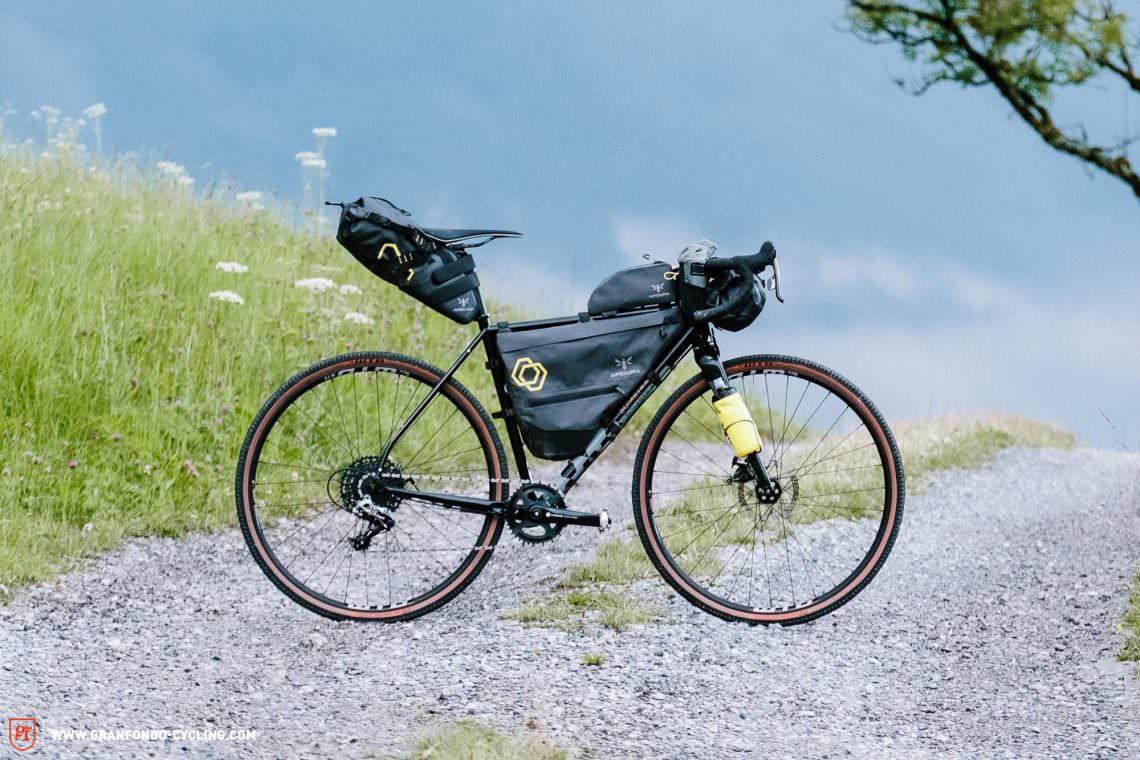
Apidura bags
| Apidura | |||
|---|---|---|---|
| Expedition Full Frame Pack | 12 l | 349 g | € 167.00 |
| Expedition Saddle Pack | 14 l | 327 g | € 142.00 |
| Expedition Handlebar Pack | 9 l | 233 g | € 108.50 |
| Expedition Top Tube Pack | 1 l | 93 g | € 53.00 |
| Backcountry Food Pouch | 0.8 l (x 2) | 69 g (x 2) | € 43.00 (x 2) |
| ø | 37.6 l | 1,140 g | € 556.50 |
ORTLIEB bags
| ORTLIEB | |||
|---|---|---|---|
| Frame-Pack | 6 l | 208 g | € 119.99 |
| Seat-Pack | 16.5 l | 478 g | € 139.99 |
| Handlebar-Pack | 9 l | 348 g | € 99.99 |
| Accessory-Pack | 3.5 l | 201 g | € 54.99 |
| Cockpit-Pack | 0.8 l | 92 g | € 49.99 |
| ø | 35.8 l | 1.327 g | € 464.95 |
Restrap bags
| Restrap | |||
|---|---|---|---|
| Frame Bag Large | 4.5 l | 236 g | € 83.99 |
| Saddle Bag 14 l | 14 l | 518 g | € 127.19 |
| Bar Bag Large | 14 + 3 l | 553 g | € 137.99 |
| Top Tube Bag | 0.8 l | 89 g | € 38.39 |
| Stem Bag | 1.1 l (x2) | 81 g (x2) | € 38.39 (x2) |
| ø | 38,5 l | 1,558 g | € 464.34 |
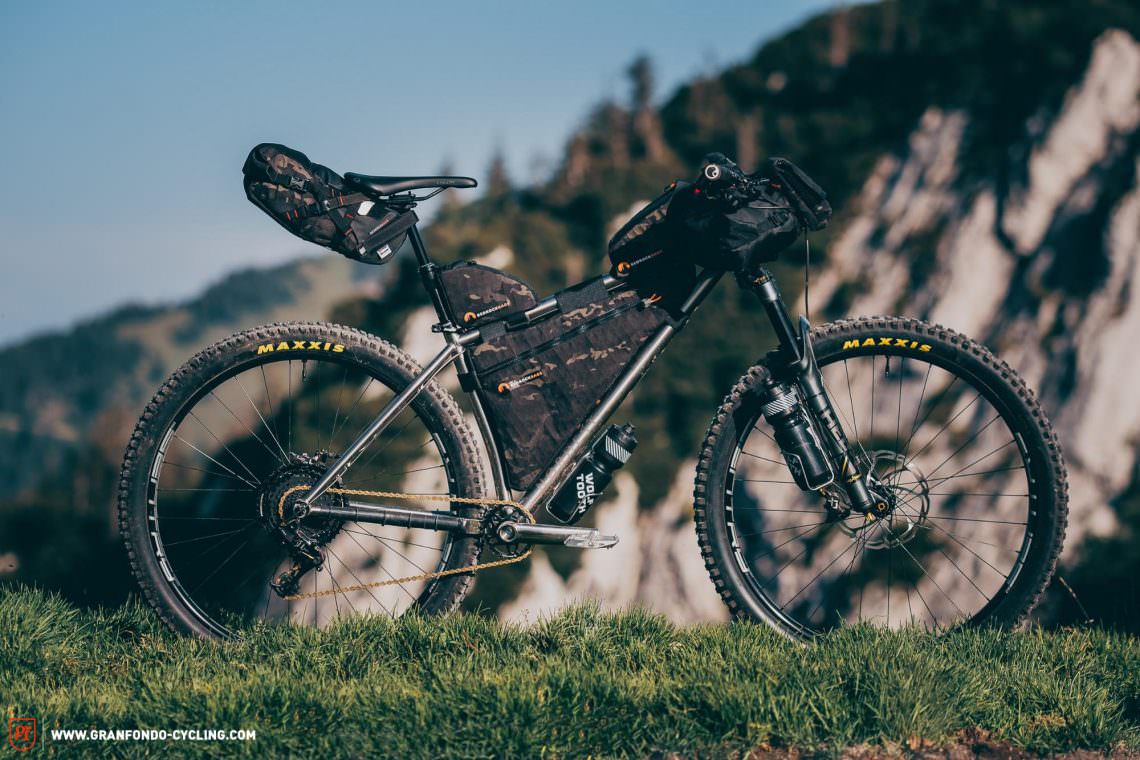
& Bedrock Bags
| Bedrock Bags | |||
|---|---|---|---|
| Custom Frame Bag | approx. 6 l | 349 g | $ 275 |
| Black Dragon Dropper Seat Bag | 7 l | 385 g | $ 175 |
| Moab Handlebar Bag | 13 l | 465 g | $ 160 |
| Dakota Tank Bag | approx. 1 l | 126 g | $ 70 |
| Kayenta Rear Tank Bag | approx. 0.5 l | 115 g | $ 70 |
| ø | approx. 27.5 l | 1,440 g | $ 750 |
6. Packing tips – What goes where?
If you’re the proud new owner of a set of bikepacking bags, the first thing you should do is give some thought to the way you’re going to distribute the contents. The way you pack has a big impact on your bike’s handling and how comfortably you’re able to access your equipment.

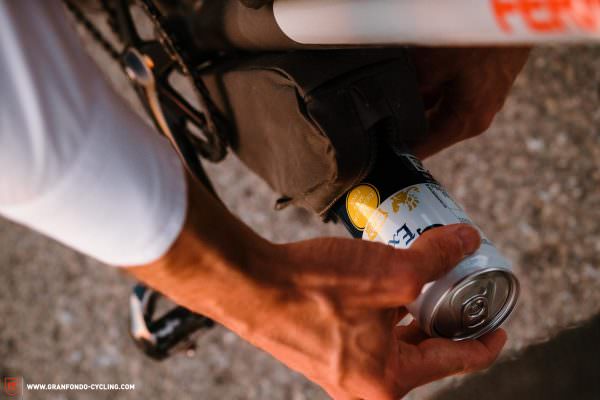
In principle, there are two useful ways of structuring the distribution of your equipment: either you sort everything according to themes such as sleeping, clothing, food etc., using one bag for each theme. Or you pack according to frequency of use. Whichever method you choose, you should always stow heavy, compact items as low and central on the bike as possible. That way, your luggage has the least negative effect on the bike’s centre of gravity and handling. You will also want to reserve at least a third of the total volume for food. A small emergency backpack like you’ll find in Apidura’s Packable range is an excellent way to expand your storage space on the fly for dinner or a bottle of wine. Another tip to keep things more orderly and, above all, dry: pack your things into light drybags or freezer bags before putting them into the main bags.
Reserve at least a third of the available storage space
for food.
If you decide to sort your things according to themes, the following logic makes sense with a classic setup: everything to do with sleeping, i.e. sleeping bag, sleeping mat and tent, goes into the handlebar bag. Often you’ll have room left for a warm down/primaloft jacket. However, the tent poles are usually too long for the handlebar role, but they should fit in the frame bag. All clothing – apart from a light jacket and a pair of gloves that you keep within reach – goes into the saddle bag along with a small first aid kit. The frame bag is where you stow your tools, a spare tube, your washing utensils and your cookware (if you’ve got any) and reserve all the remaining space for food. That leaves all the snacks, your mobile phone, other small electronic items such as headlamps, headphones or powerbanks. You can simply distribute these in the top tube bag, stem bags and other additional bags on the cockpit as you like. It often makes sense to stow individual items such as a mini tool or a spoon or knife within reach on the cockpit instead of hiding them together with the rest of your things in the depths of the frame bag.
Heavy, compact things should always get stowed as low and central as possible.
If you’re going to pack according to frequency of use, you’ll have to figure out for yourself what you need to access most often. In principle, the least frequently used things will go into the handlebar bag or deep down in the saddle or frame bag and things that you need more often get distributed in the pockets on the cockpit. If you’ve got a lot of things that you want quick and easy access to, bags with roll-top closures will be the least convenient. In that case, take a look at the wide models with a large flap for your saddle and handlebar.
Conclusion
By now you should know pretty much everything there is to know about bikepacking bags. You’re probably suffering from information overload, but don’t worry! Don’t overthink it, just use what you have for now and add to your setup piece by piece. The more often you ride, the quicker you’ll find out what you need and how and where to stow it. After all, bikepacking bags are only a means to an end, which is to have fun on the bike and on your trip.
Bonus info: You will most likely find the right bikepacking bike in our big test with 12 gravel and mountain bikes for bikepacking. If we’ve lit a fire and you’re burning to know more, we definitely recommend paying a visit to bikepacking.com. There you will find more in-depth information and tests on all types of bags and equipment specifically for bikepacking.
Did you enjoy this article? If so, we would be stoked if you decide to support us with a monthly contribution. By becoming a supporter of GRAN FONDO, you will help secure a sustainable future for high-quality cycling journalism. Click here to learn more.
Words: Photos: Diverse